Easy Star Wars Painted Rocks: Your Gateway to Galaxy Far, Far Away
Ever wondered how to bring the Force into your backyard? Star Wars painted rocks transform ordinary stones into legendary characters. I’m about to show you exactly how.
These simple projects captivate both kids and adults alike. The magic happens when basic materials meet your creativity. You’ll be amazed at what three colors can accomplish.
What We’re Creating: Star Wars Character Rocks
I’ve been painting rocks for years, and Star Wars themes never get old. These easy star wars painted rocks capture the essence of beloved characters using minimal supplies. Think of them as mini masterpieces that fit in your palm.
The beauty lies in their simplicity. You don’t need artistic training or expensive materials. Just basic acrylic paints and a steady hand. I’ve watched complete beginners create stunning pieces in under an hour.
These rocks work perfectly as:
- Garden decorations
- Gifts for Star Wars fans
- Craft projects with kids
- Desktop collectibles
- Party favors
Materials Needed
Here’s everything you need for your simple star wars painted rocks step by step project:
| Material | Quantity | Purpose | Cost Range | Where to Find |
|---|---|---|---|---|
| Rocks | 3-5 pieces | Base canvas | Free | Your yard, beach, craft store |
| White Acrylic Paint | 1 bottle | Base coat | $2-4 | Any craft store |
| Brown Acrylic Paint | 1 bottle | Character details | $2-4 | Craft stores |
| Black Acrylic Paint | 1 bottle | Outline and features | $2-4 | Craft stores |
| Varnish/Sealer | 1 bottle | Protection | $5-8 | Hardware or craft stores |
| Flat Brush | 1 piece | Base coating | $3-5 | Art supply stores |
| Detail Brush | 1 piece | Fine lines | $2-4 | Art supply stores |
| Water Container | 1 | Brush cleaning | Free | Any container |
| Paper Towels | 1 roll | Cleanup | $2-3 | Grocery stores |
Pro tip: Smooth, flat rocks work best. I always look for stones about the size of my palm.
Step-by-Step Instructions
Step 1: Prepare Your Base
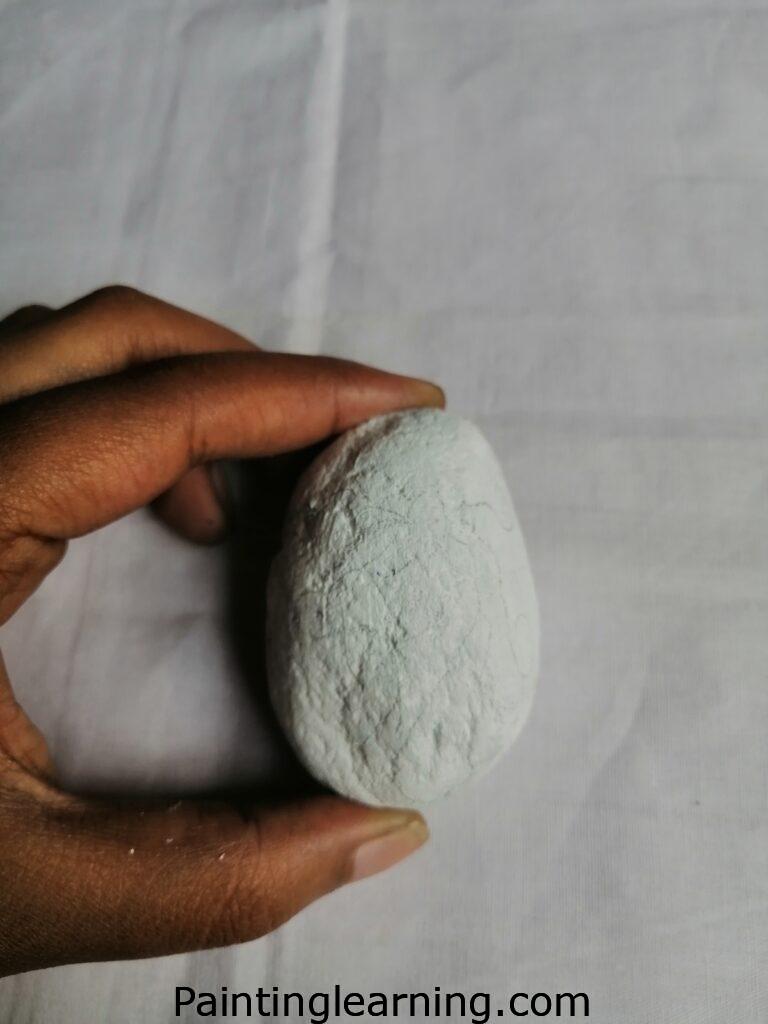
Start with the foundation. Paint your rock completely white and let it dry thoroughly. This base coat makes all other colors pop.
I learned this the hard way – rushing this step ruins everything. Give it at least 30 minutes to dry completely. Trust me on this one.
Step 2: Add Character Color
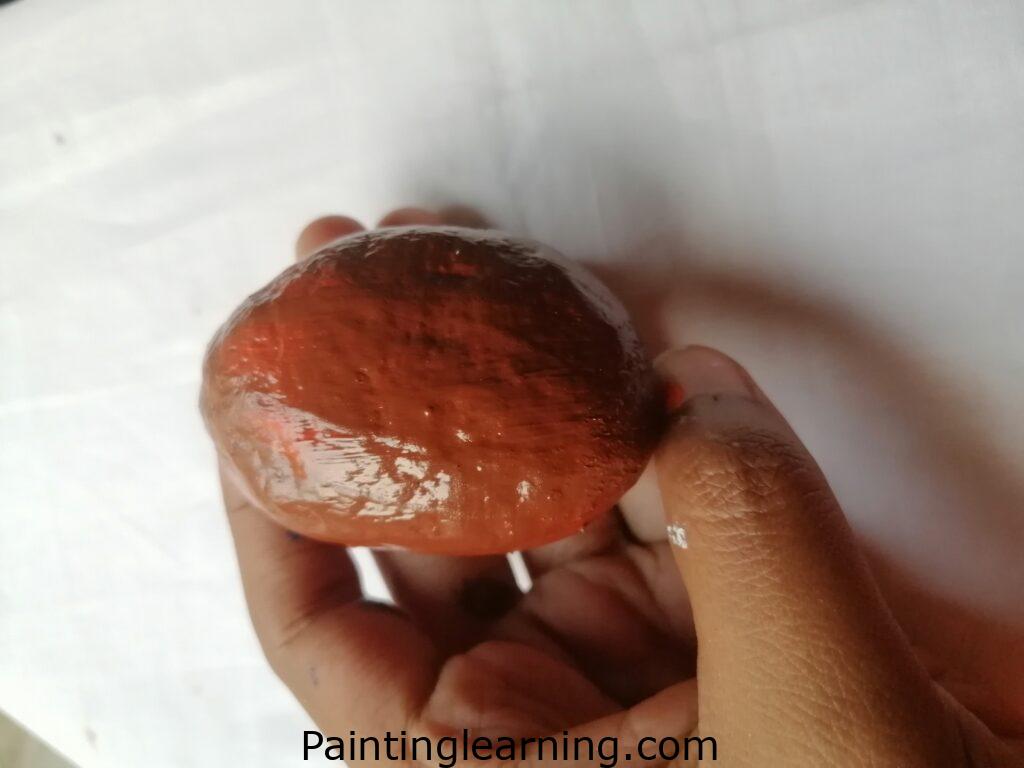

Now comes the fun part. Use brown paint to create your Star Wars character. Follow reference images if you need guidance.
The brown should go on smoothly over your white base. Work in thin layers rather than thick globs. This prevents drips and creates even coverage.
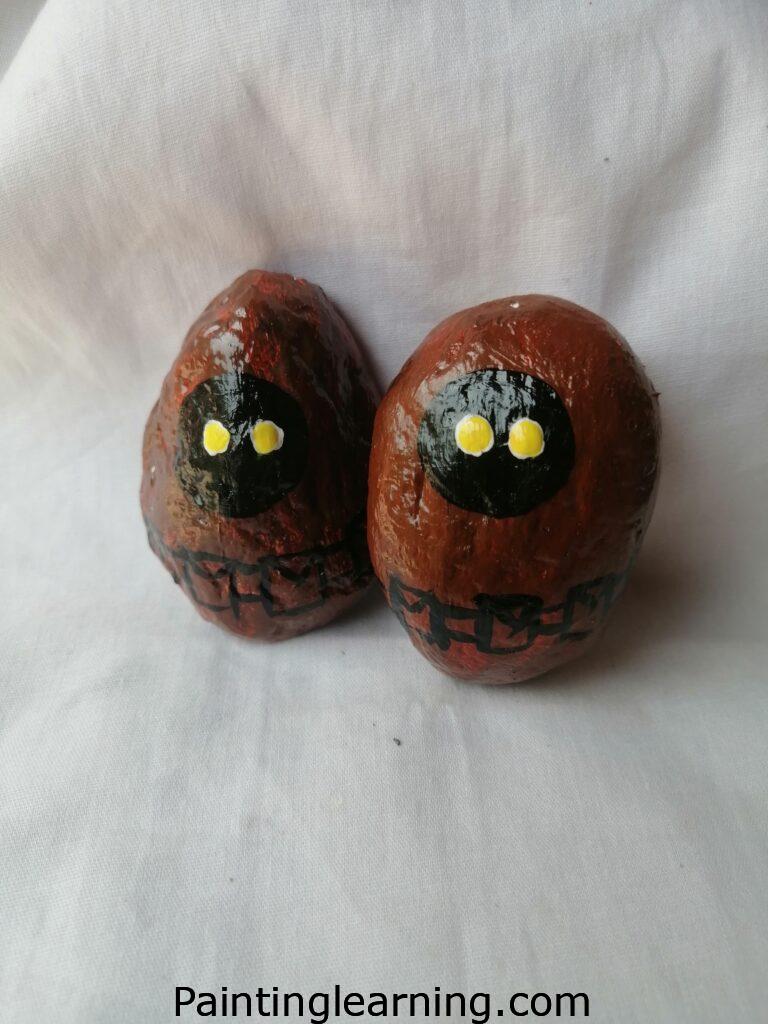
Step 3: Define with Details

Time for the detail brush. Use black paint to create outlines, facial features, and defining characteristics.
This step requires patience. I take my time with each line. Shaky hands? Rest your painting hand on your other hand for stability.
Step 4: Seal and Protect
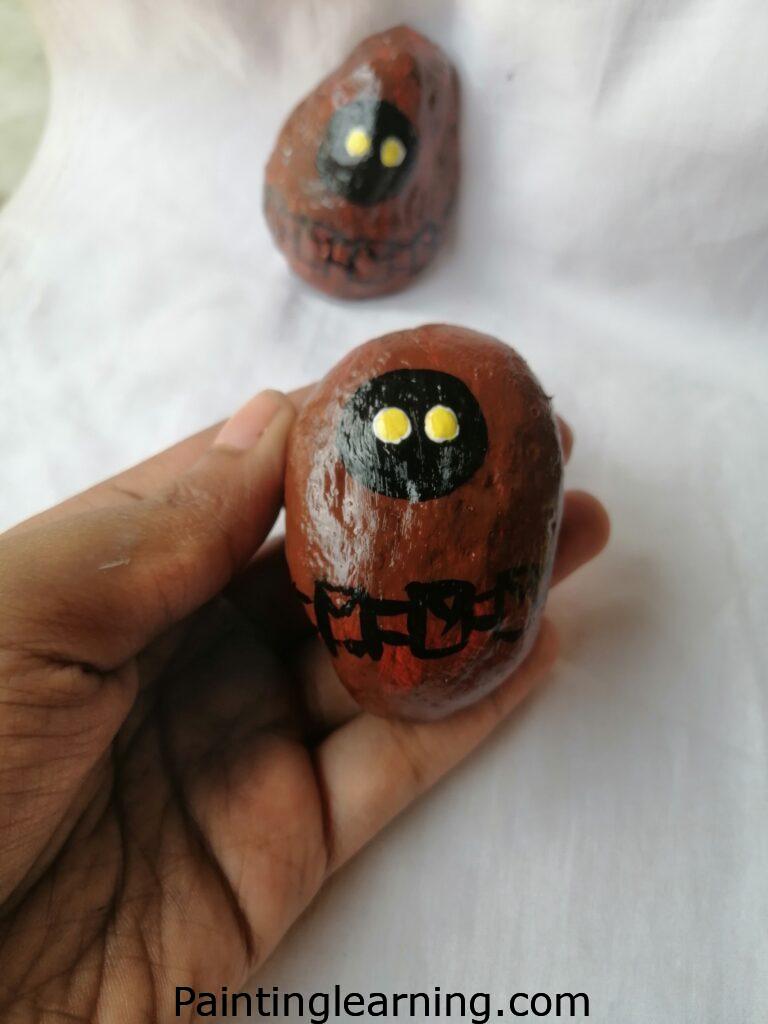
Once everything’s dry, apply varnish. This protects your artwork from weather and handling.
One thin coat does the trick. Let it cure for 24 hours before handling extensively.
Tips for Success
Choose the right rocks: Smooth, flat surfaces work best. Avoid porous or rough stones.
Thin your paints: Add a drop of water if paint seems too thick. This prevents brush marks.
Clean brushes between colors: Even small amounts of mixed paint can muddy your colors.
Work in good lighting: Natural light shows colors most accurately.
Let each layer dry completely: Rushing leads to smudged work and frustration.
Practice on paper first: Test your design before committing to the rock.
I always keep a damp cloth nearby for quick cleanup. Acrylic paint dries fast, so work efficiently.
Common Mistakes and How to Avoid Them
Mistake 1: Skipping the Base Coat
Problem: Colors look dull and uneven. Solution: Always use white primer base coat.
Mistake 2: Using Too Much Paint
Problem: Details get lost in thick paint layers. Solution: Apply thin coats, build up gradually.
Mistake 3: Not Letting Layers Dry
Problem: Colors blend and create muddy appearance. Solution: Wait 15-20 minutes between coats.
Mistake 4: Wrong Brush Size
Problem: Lines too thick or coverage too sparse. Solution: Use flat brush for base, detail brush for lines.
Mistake 5: Forgetting to Seal
Problem: Paint chips off with handling. Solution: Always apply varnish as final step.
Similar Variations You Can Make
Once you master basic star wars painted rock instructions, try these variations:
Stormtrooper Rocks: White base with black details. Perfect for beginners.
Yoda Rocks: Green base with brown accents. Add his signature ears.
Darth Vader Rocks: Black base with silver details. Very dramatic.
R2-D2 Rocks: Blue and white combination. Kids love this one.
BB-8 Rocks: Orange and white spherical design. Requires round rocks.
Chewbacca Rocks: All brown with texture techniques. Great for practicing brush strokes.
I’ve created entire Star Wars rock families. Each character has its own personality when painted on stone.
Advanced Techniques
Dry Brushing
Load brush with paint, wipe most off, then lightly brush over surface. Creates texture.
Layering
Build up colors gradually. Each thin layer adds depth.
Highlighting
Add white touches to raised areas. Makes characters more three-dimensional.
Shading
Use darker colors in recessed areas. Creates depth and dimension.
Displaying Your Creations
Garden Display: Arrange rocks among plants for surprise discoveries.
Shadow Box: Frame your favorites in display cases.
Rock Garden: Create dedicated space for your collection.
Gift Presentation: Package in small boxes with tissue paper.
I keep my favorites on my desk. They’re great conversation starters during video calls.
Caring for Your Painted Rocks
Indoor Storage: Keep away from direct sunlight to prevent fading.
Outdoor Display: Refresh varnish annually for weather protection.
Cleaning: Gentle soap and water when needed. Avoid harsh chemicals.
Handling: Pick up carefully to avoid chipping edges.
Troubleshooting Common Issues
Paint won’t stick: Rock surface too smooth. Light sanding helps.
Colors look muddy: Too much water or mixing on rock. Start fresh.
Brush marks visible: Paint too thick or brush too small. Thin paint slightly.
Varnish looks cloudy: Applied too thick or over damp paint. Let dry longer.
Building Your Star Wars Rock Collection
Start with one character. Master the technique before moving to complex designs. I began with simple Stormtrooper helmets before attempting Yoda’s wrinkled face.
Week 1: Practice basic shapes and color application. Week 2: Add simple details and outlines. Week 3: Experiment with shading and highlights. Week 4: Try complex characters like Darth Vader.
Cost Breakdown
Your initial investment runs about $25-30 for all supplies. After that, you can paint dozens of rocks. Each rock costs roughly $0.50 in materials.
Compare that to buying collectibles! I’ve created gifts that friends treasure more than store-bought items.
Safety Considerations
Ventilation: Work in well-ventilated area when using varnish.
Skin Contact: Wash hands thoroughly after painting.
Eye Protection: Keep detail brushes away from face.
Child Safety: Supervise young children with small brushes.
Seasonal Variations
Halloween: Dark side characters with spooky backgrounds.
Christmas: Holiday-themed Star Wars scenes.
Summer: Bright colors for outdoor displays.
Winter: Cozy indoor projects during cold months.
Community and Sharing
Join local rock painting groups. Many communities have Facebook groups for sharing creations. I’ve learned countless techniques from other painters.
Rock Hiding: Paint extras to hide around town for others to find.
Craft Fairs: Sell your creations at local events.
Teaching: Share skills with kids’ groups or community centers.
Essential Definitions
Base Coat: First layer of paint that covers entire surface.
Detail Work: Fine lines and small features added with small brushes.
Varnish: Clear protective coating applied over finished paint.
Dry Time: Period needed for paint to cure before next step.
Frequently Asked Questions
Q: How long does each rock take to complete? A: About 45 minutes to 1 hour, including drying time between steps.
Q: Can I use other paint types? A: Acrylic works best. Watercolors won’t stick properly to rock surfaces.
Q: What if I make a mistake? A: Let it dry completely, then paint over with white and start again.
Q: How long do painted rocks last outdoors? A: With proper varnish, 2-3 years in weather. Longer if refreshed annually.
Q: Can kids do this project? A: Absolutely! Supervise with detail brushes and have fun together.
Q: Where can I find good rocks? A: Beach, riverbank, craft stores, or landscape suppliers.
Final Thoughts
Creating how to paint a star wars on a rock projects brings joy to makers of all ages. These simple supplies transform into treasured keepsakes. The Force is strong with anyone willing to pick up a brush.
Start your collection today. May your painted rocks bring as much happiness as they’ve brought to my crafting journey.