Easy Unicorn Painted Rocks: Transform Ordinary Stones into Magical Masterpieces
Ever wondered how to turn a simple rock into pure magic? Today I’ll show you exactly how to create stunning unicorn painted rocks that’ll make everyone smile.
These aren’t just painted stones. They’re tiny portals to enchantment waiting in your backyard.
Creating Your Own Unicorn Rock Masterpiece
I remember the first time I painted a unicorn on a rock. My daughter’s eyes lit up like Christmas morning when she saw that plain gray stone transform into something magical. That’s the power of simple unicorn painted rocks step by step – they bring joy to both the creator and everyone who sees them.
Rock painting has become my go-to craft for rainy afternoons and creative moments. There’s something deeply satisfying about taking nature’s canvas and adding your own touch of whimsy. When you combine that with the timeless appeal of unicorns, you get something truly special.
Unicorn Rock Painting: The art of transforming ordinary rocks into magical unicorn-themed decorative pieces using acrylic paints and creative techniques.
Base Coating: The initial layer of paint applied to prepare the rock surface for detailed artwork.
Detail Work: Fine brush strokes used to add features like eyes, mane details, and magical elements to the unicorn design.
Materials Needed
Getting the right supplies makes all the difference between a frustrating experience and a magical one. Here’s everything you’ll need for your unicorn painted rock instructions:
| Material | Purpose | Quantity | Tips | Where to Find |
|---|---|---|---|---|
| Rocks | Canvas for painting | 1 medium sized | Choose smooth, flat surfaces | Your backyard, craft stores, or beaches |
| White Acrylic Paint | Base color and unicorn body | 1 bottle (2oz) | Use high-quality for better coverage | Craft stores, online retailers |
| Blue Acrylic Paint | Mane accents and details | 1 bottle (2oz) | Cerulean or sky blue works best | Art supply stores |
| Brown Acrylic Paint | Horn and hooves | 1 small bottle | Raw umber is perfect | Craft sections |
| Pink Acrylic Paint | Mane highlights and cheeks | 1 bottle (2oz) | Soft pink, not hot pink | Any craft store |
| Yellow Acrylic Paint | Mane colors and highlights | 1 bottle (2oz) | Lemon yellow preferred | Art supply retailers |
| Orange Acrylic Paint | Mane gradient effects | 1 bottle (2oz) | Cadmium orange ideal | Craft stores |
| Black Acrylic Paint | Outlines and details | 1 small bottle | Essential for definition | Everywhere |
| Varnish/Sealer | Protection and shine | 1 bottle | Polyurethane or acrylic sealer | Hardware or craft stores |
| Flat Brush | Base coating | 1 medium size | 1/2 inch width perfect | Art supply stores |
| Detail Brush | Fine work and outlines | 2-3 brushes | Size 0 and 2 recommended | Craft stores |
| Pencil | Sketching design | 1 regular pencil | 2B works well on rocks | Anywhere |
| Paper Towels | Cleaning and blotting | 1 roll | Essential for clean work | Grocery stores |
| Water Container | Brush cleaning | 1 small jar | Change water frequently | From your kitchen |
Step-by-Step Guide: How to Paint a Unicorn on a Rock
Now comes the fun part! I’ll walk you through each step of creating your magical unicorn rock. Take your time – there’s no rush in art.
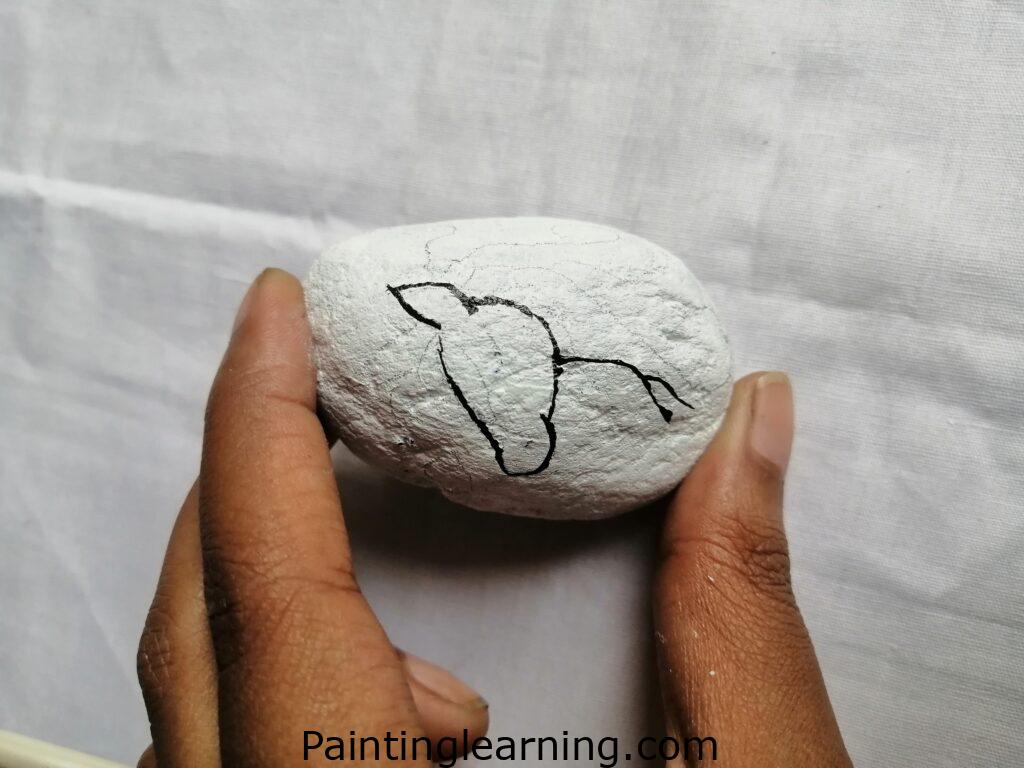
Step 1: Prepare Your Base
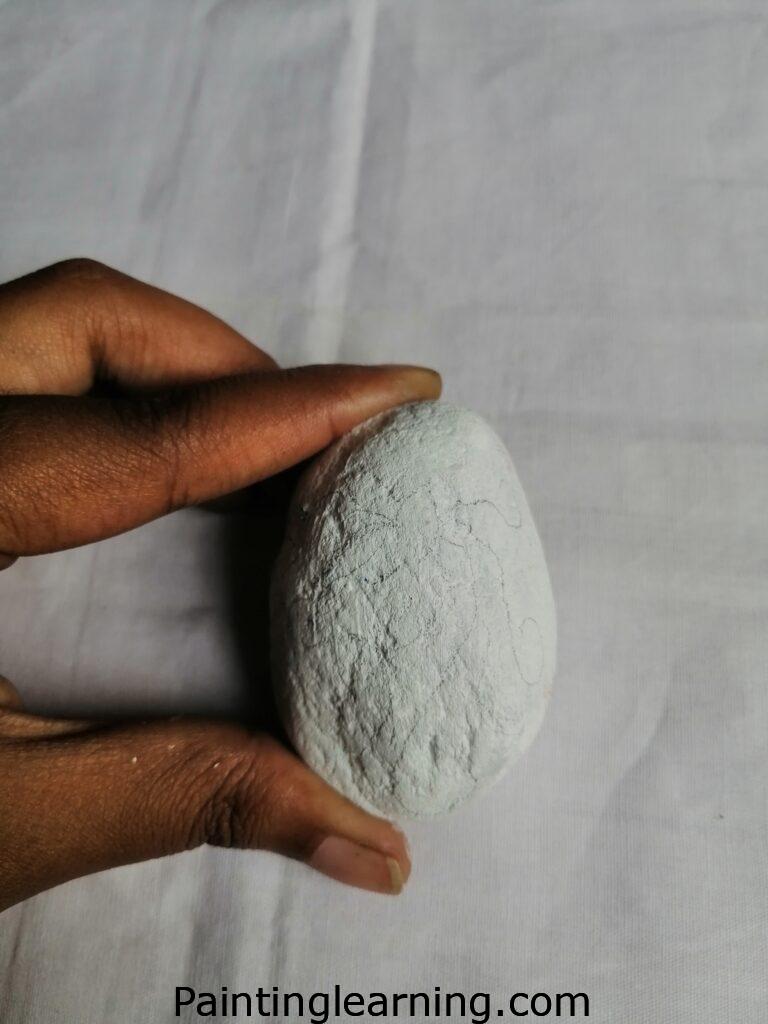
First, let’s get that rock ready for magic. Paint your entire rock with white acrylic paint using your flat brush. Don’t worry about making it perfect – unicorns are all about whimsy, not perfection.
Let this base coat dry completely. I usually wait about 30 minutes, but it depends on humidity and temperature. While you’re waiting, grab a cup of coffee or tea. This is your creative time.
Once dry, take your pencil and lightly sketch your unicorn design. Start with basic shapes – an oval for the head, a triangle for the horn, and flowing lines for the mane. Remember, this is just your guide.
Step 2: Add the Magical Colors
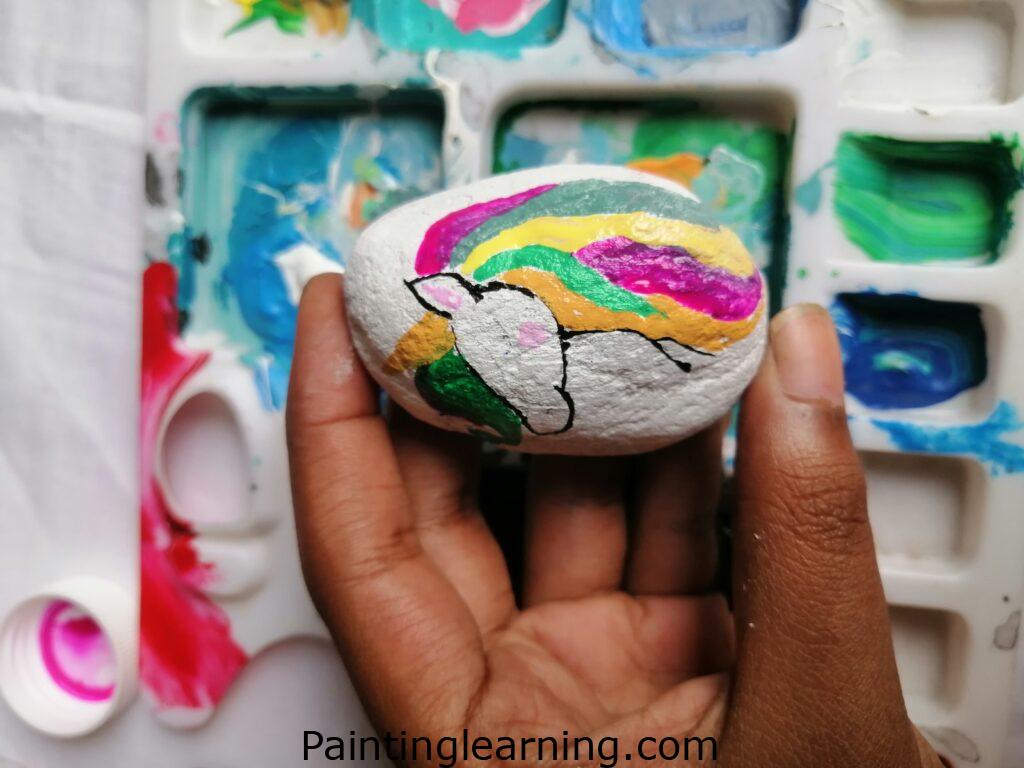
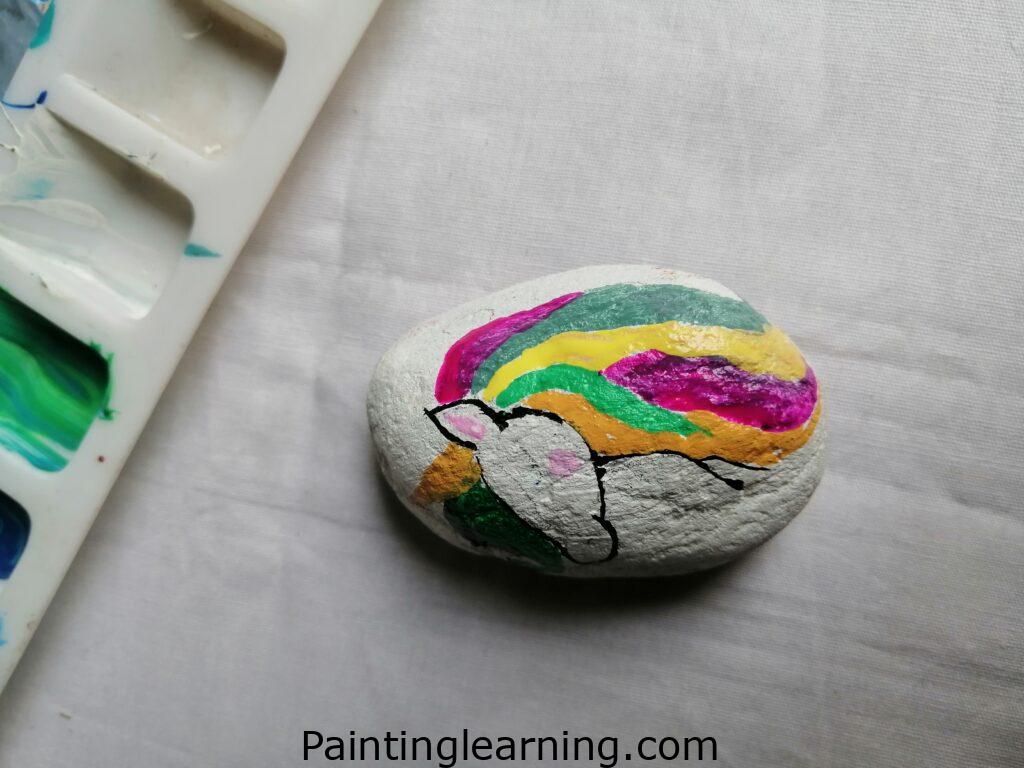
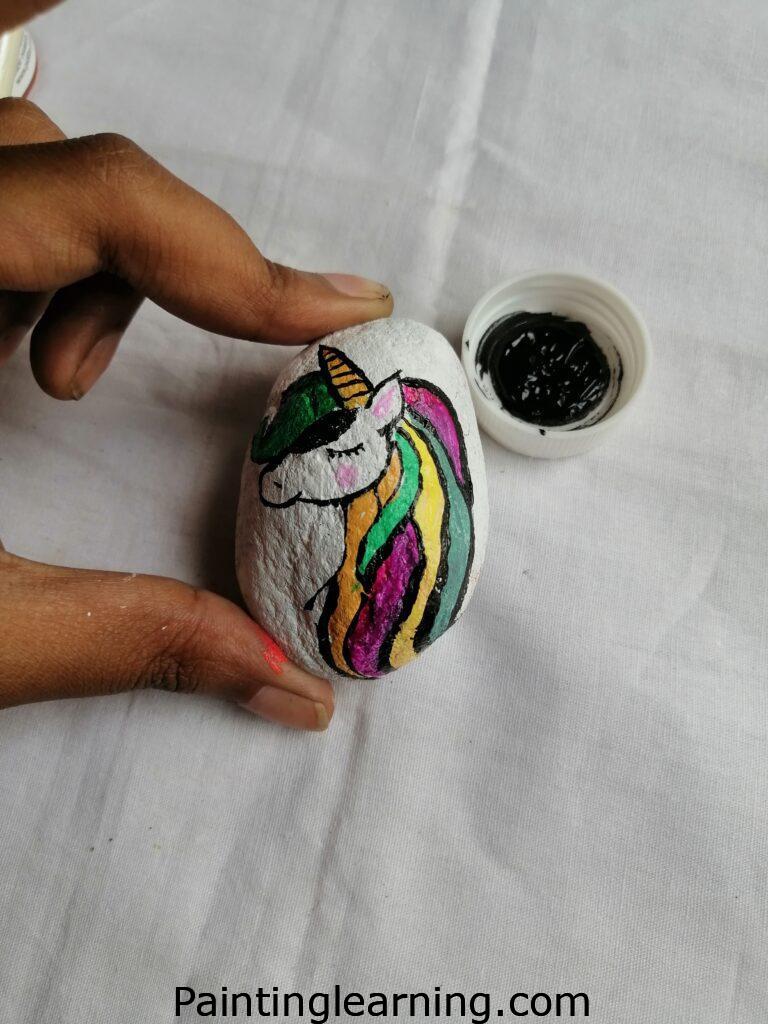
Here’s where your rock truly comes alive. Paint your unicorn using multiple colors just like a rainbow mane flowing in the wind. I start with the horn – a lovely golden brown that catches the light.
Next, tackle that gorgeous mane. Use your detail brush to apply pink, blue, yellow, and orange in flowing strokes. Don’t blend them perfectly – let each color sing on its own while dancing with its neighbors.
The unicorn’s body stays white, but add some soft pink to the cheeks and maybe a hint of blue shadow under the chin. These little touches make all the difference.
Let everything dry completely before moving to the next step. Patience is key here.
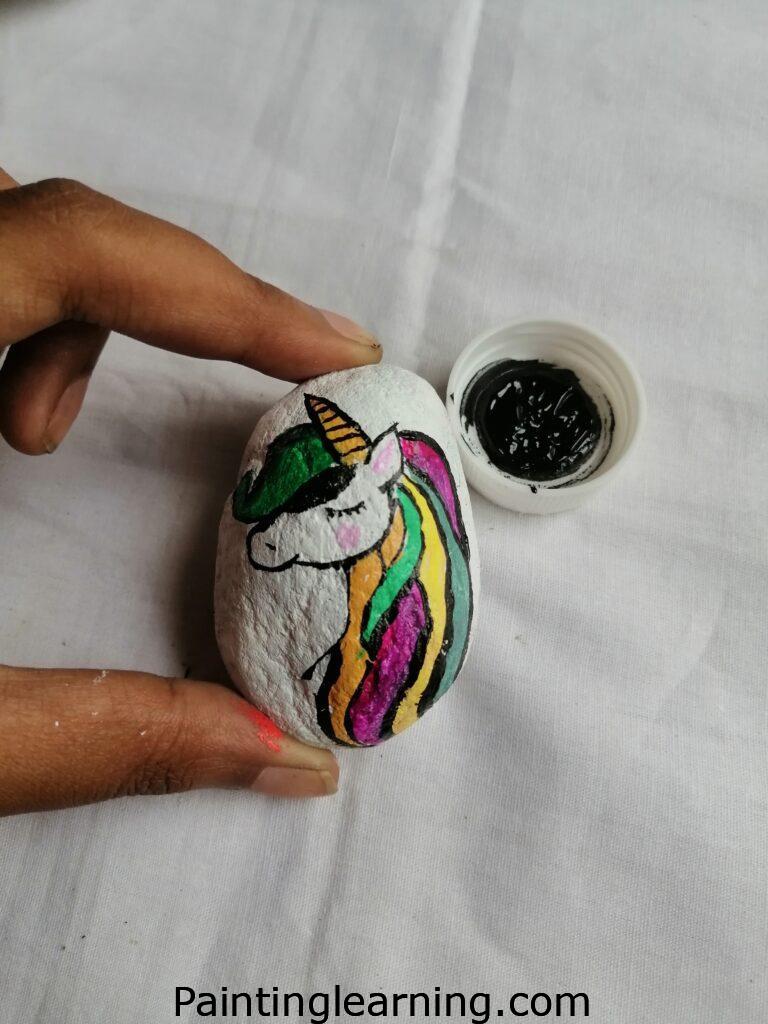
Step 3: Define with Details
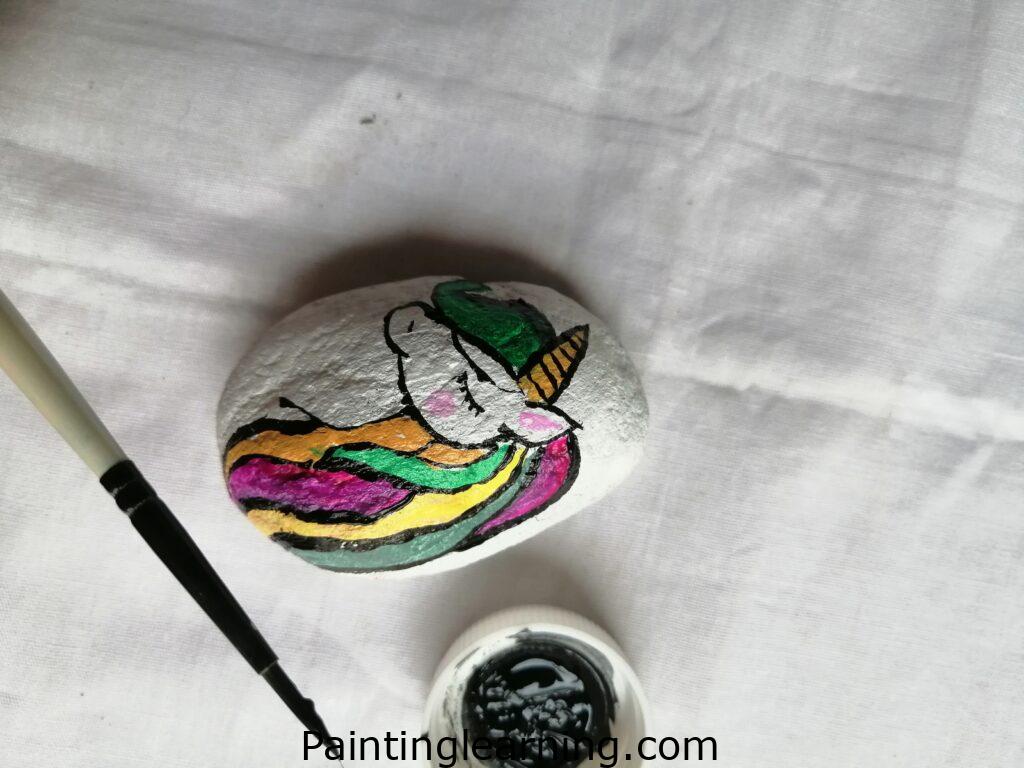
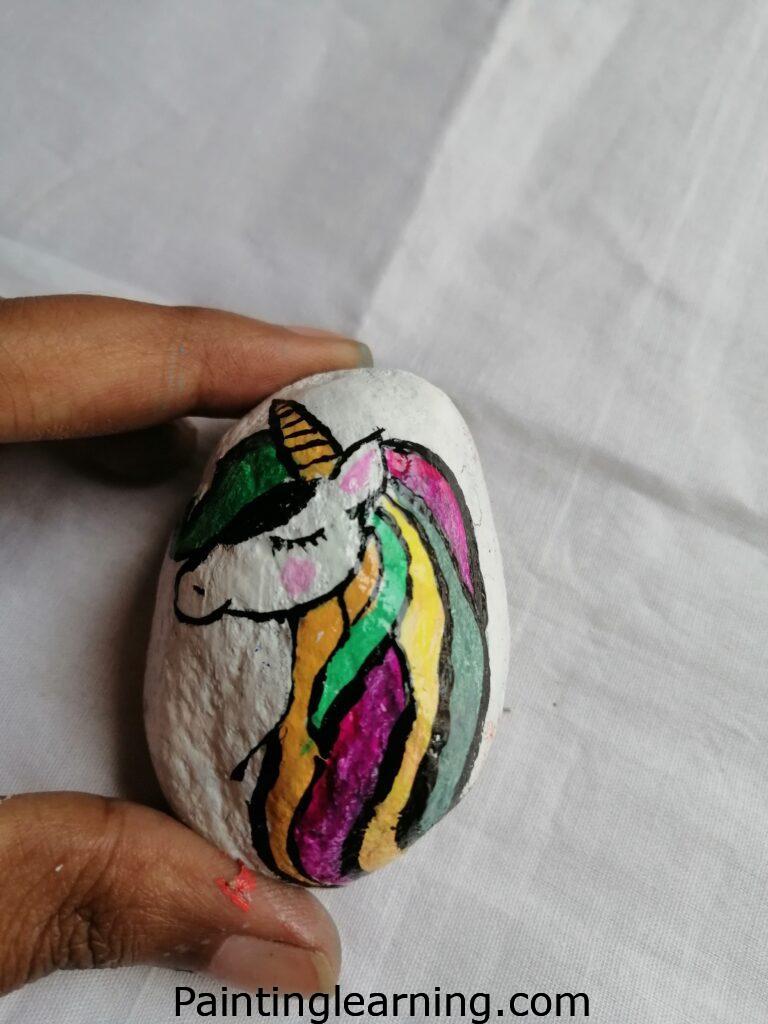
Now grab your finest detail brush and that black paint. Draw clean black lines to outline your unicorn’s features. This step transforms your colorful rock into a true work of art.
Add the eye with a gentle curve, define the nostril with a small dot, and outline the horn with confident strokes. The mane gets subtle black lines too – just enough to separate the colors without overwhelming them.
Let this dry completely, then apply your varnish or sealer. This protective layer keeps your unicorn looking fresh and magical for years to come.
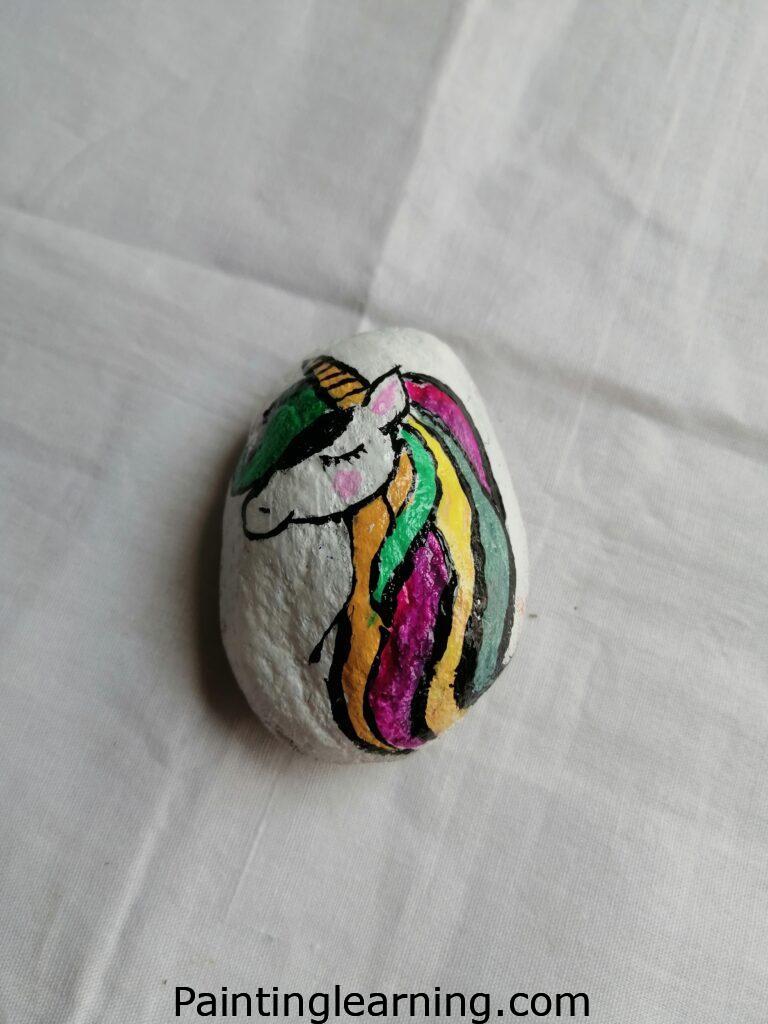
Step 4: Final Touches
Your unicorn rock is now ready to spread joy wherever it goes! But before you declare victory, take a moment to admire your work. You’ve just created something truly special.
I like to add a few extra touches sometimes – maybe a small star near the horn or tiny sparkles in the mane. These details aren’t necessary, but they make each rock unique.
Tips for Success
Creating beautiful unicorn rocks isn’t just about following steps – it’s about embracing the magic of the process. Here are my tried-and-true tips:
Choose the right rocks. Smooth, flat surfaces work best. I spend time selecting rocks that already have interesting shapes or natural curves that suggest a unicorn’s profile.
Layer your paint. Don’t try to get perfect coverage in one coat. Multiple thin layers look more professional than one thick, gloopy application.
Keep brushes clean. Dirty brushes muddy your colors faster than you’d believe. I keep two water containers – one for initial cleaning, one for final rinses.
Work in good light. Natural light is best, but a bright lamp works too. You need to see those subtle color variations and detail work clearly.
Take breaks. If you’re getting frustrated, step away. Art should be enjoyable, not stressful. Sometimes the best insights come when you’re not actively trying.
Common Mistakes and How to Avoid Them
I’ve made plenty of mistakes over the years, and each one taught me something valuable. Here’s what to watch out for:
Rushing the drying process. I know it’s tempting to keep going, but wet paint smudges instantly ruin hours of work. Set a timer if you need to.
Making the design too complex. Start simple. A basic unicorn profile with a flowing mane is more effective than an overly detailed design that gets muddy.
Using too much black. Black lines should define, not dominate. If your unicorn looks like a coloring book, you’ve gone too far.
Forgetting the sealer. Unsealed rocks fade quickly outdoors. Don’t skip this crucial final step.
Not cleaning your workspace. Dried paint on your table becomes part of your next project whether you want it or not.
Similar Variations You Can Make
Once you’ve mastered the basic unicorn, the creative possibilities are endless. Here are some variations I love:
Alicorn rocks – Add wings to create the ultimate magical creature. Use the same technique but extend flowing feathers from the sides.
Baby unicorn families – Create a whole herd using smaller rocks. Each family member can have slightly different mane colors.
Seasonal unicorns – Autumn unicorns with orange and red manes, winter unicorns with icy blue and silver, spring unicorns with soft pastels.
Galaxy unicorns – Use deep purples and blues with metallic accents to create a cosmic theme.
Minimalist unicorns – Sometimes less is more. A simple silhouette with just a hint of color can be stunning.
Displaying and Sharing Your Unicorn Rocks
Your finished unicorn rocks deserve to be seen and enjoyed. I place mine in my garden where they surprise visitors with little bursts of magic. Some people create rock gardens specifically for their painted treasures.
Consider starting a rock painting group in your neighborhood. There’s something wonderful about sharing this craft with others. Kids especially love the magic of turning ordinary rocks into extraordinary art.
You can also hide your rocks around town for others to find – many communities have rock painting groups that encourage this kind of artistic treasure hunting.
Frequently Asked Questions
Q: What type of rocks work best for unicorn painting? A: Smooth river rocks or flat stones work beautifully. Avoid porous rocks like sandstone as they absorb too much paint.
Q: Can I use regular craft paint instead of acrylic? A: Acrylic paint is really your best bet. It adheres well to rocks and holds up to weather if you’re displaying outside.
Q: How long should I let each layer dry? A: At least 30 minutes between coats, but humidity affects drying time. When in doubt, wait longer.
Q: Can kids do this project? A: Absolutely! Kids love unicorn rocks. Just supervise the detail work and help with the varnish application.
Q: My paint looks streaky. What am I doing wrong? A: You might be applying it too thick or your brush is too dry. Try thinning the paint slightly with water.
Q: Do I need expensive brushes? A: Not at all. Basic craft brushes work fine. Just make sure you have both flat and detail brushes.
The Magic Continues
Creating easy unicorn painted rocks has become more than just a craft for me – it’s a way to add magic to ordinary moments. Every time I see one of my painted rocks, whether it’s sitting in my garden or brightening someone else’s day, I’m reminded of the joy that comes from creating something beautiful with your own hands.
The best part about this hobby is that it keeps evolving. Each rock teaches you something new, and every unicorn has its own personality. Start with these basic techniques, but don’t be afraid to experiment and make each creation uniquely yours.