Easy Nativity Painted Rocks: Your Complete Step-by-Step Guide
Ever wondered how to paint a nativity on a rock that captures Christmas magic? Rock painting transforms ordinary stones into meaningful holiday treasures. These simple nativity painted rocks bring spiritual beauty to any space.
I’ve been painting rocks for years. Trust me, nothing beats the satisfaction of creating something beautiful from scratch. Today I’ll walk you through every detail.
What Are Nativity Painted Rocks?
Nativity painted rocks are small artistic creations that depict the biblical scene of Jesus’s birth. These aren’t just random decorations. They’re meaningful pieces that tell a story.
I love how these rocks capture the essence of Christmas in such a simple form. Each stone becomes a tiny canvas. You’re not just painting. You’re creating memories.
The beauty lies in their simplicity. No complex tools needed. No expensive materials required. Just basic supplies and your creativity.
Materials Needed
Here’s everything you’ll need for your nativity painted rock instructions:
| Material | Purpose | Quality Level | Cost Range | Where to Find |
|---|---|---|---|---|
| Rocks | Base canvas | Smooth, flat surface | Free | Outdoors, craft stores |
| White Acrylic Paint | Base coating | High-quality, opaque | $2-5 | Art stores, online |
| Blue Acrylic Paint | Sky and robes | Various shades preferred | $2-5 each | Art stores, craft shops |
| Black Acrylic Paint | Details and outlines | Concentrated pigment | $2-5 | Art supply stores |
| Varnish/Sealer | Protection coating | Weather-resistant | $5-10 | Hardware stores |
| Flat Brush | Base painting | 1-2 inch width | $3-8 | Art stores |
| Detail Brush | Fine work | Size 0-2 | $2-6 | Craft stores |
| Palette | Color mixing | Disposable or reusable | $1-5 | Art supplies |
| Water Container | Brush cleaning | Any clean container | Free | Kitchen |
| Paper Towels | Cleanup | Absorbent | $2-4 | Grocery stores |
Rock Selection Tips
Not all rocks work the same. I’ve learned this the hard way. Look for stones that are:
- Smooth surface: Bumpy rocks make painting difficult
- Flat base: They need to sit steady
- Medium size: About palm-sized works best
- Light colored: Darker stones need more base coats
Step-by-Step Nativity Rock Painting Process
Step 1: Prepare Your Base Color

Start with a clean, dry rock. This foundation matters more than you think.
Apply white acrylic paint evenly across the entire surface. Use your flat brush for this. Don’t rush this step. Let it dry completely.
Pro tip: I always apply two coats of white. The second coat makes colors pop better.
Step 2: Create the Nativity Scene
Now comes the fun part. Paint your rock just like a nativity scene.
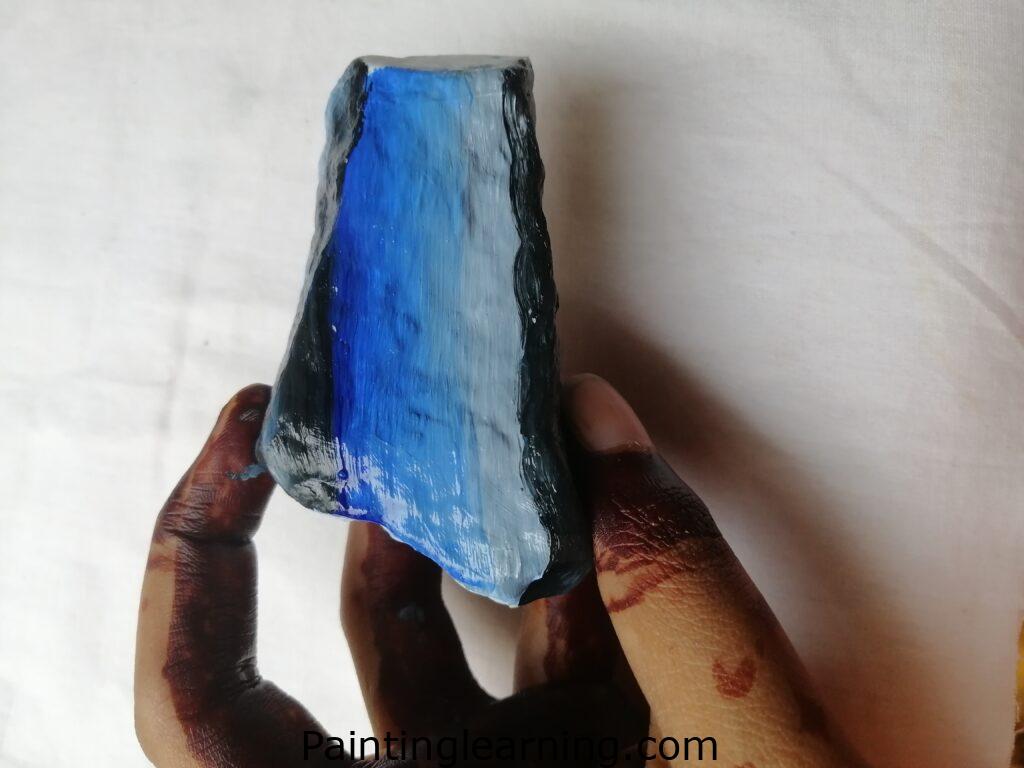
Mix different shades of blue for the sky. I love creating gradients here. Start with lighter blues at the bottom. Gradually add darker shades toward the top.
For the figures, use simple shapes:
- Mary: Blue robe, gentle posture
- Joseph: Brown or tan clothing
- Baby Jesus: Small figure in white
- Stable: Simple geometric shapes
- Star: Bright yellow or gold
Let each layer dry before adding the next. Patience pays off here.
Step 3: Apply Protective Varnish

Once everything is completely dry, apply your varnish sealer. This protects your artwork from weather and handling.
Use thin, even coats. I prefer two light coats over one heavy one. This prevents dripping and clouding.
Step 4: Final Touches and Completion

Your simple nativity painted rocks step by step process is nearly done. Add any final details you want.
Maybe a few stars in the sky. Perhaps some texture on the stable walls. These small touches make big differences.
Tips for Success
I’ve made plenty of mistakes over the years. Here’s what I’ve learned:
Color Mixing Secrets
- Start with small amounts of paint
- Mix more than you think you’ll need
- Keep a color journal for future reference
- Test colors on paper scraps first
Brush Techniques
- Flat brush: Use for large areas and base coats
- Detail brush: Perfect for fine lines and small features
- Clean brushes between colors
- Don’t let paint dry in the bristles
Painting Environment
Set up in good lighting. Natural light works best. Keep your workspace organized. You’ll work more efficiently.
Common Mistakes and How to Avoid Them
Mistake 1: Rushing the Drying Process
The problem: Paint layers mix together, creating muddy colors.
The solution: Wait at least 30 minutes between coats. I often work on multiple rocks to stay productive.
Mistake 2: Using Too Much Paint
The problem: Thick paint takes forever to dry and can crack.
The solution: Apply thin, even coats. Build up color gradually.
Mistake 3: Skipping the Base Coat
The problem: Colors look dull and uneven.
The solution: Always use a white base, especially on dark rocks.
Mistake 4: Poor Rock Selection
The problem: Bumpy or oddly shaped rocks are hard to paint.
The solution: Take time finding the right stones. It’s worth the effort.
Similar Variations You Can Create
Once you master basic nativity rocks, try these variations:
Seasonal Themes
- Easter rocks: Crosses, empty tombs, spring flowers
- Christmas angels: Winged figures, harps, halos
- Wise men: Camels, gifts, desert scenes
Different Artistic Styles
- Minimalist approach: Simple silhouettes
- Detailed realism: Intricate facial features
- Abstract interpretation: Color and shape focused
Size Variations
- Tiny rocks: Perfect for gift giving
- Large stones: Statement pieces for gardens
- Rock families: Multiple connected pieces
Advanced Techniques for Experienced Painters
Gradient Skies
Create stunning sunset or night sky backgrounds. Start with light colors. Gradually blend darker shades.
Texture Effects
Use sponges for cloud textures. Try dry brushing for worn wood effects. These techniques add professional polish.
Metallic Accents
Gold and silver paints create beautiful star effects. Use sparingly for maximum impact.
Displaying Your Finished Nativity Rocks
Indoor Display Ideas
- Mantel arrangements: Group multiple rocks together
- Table centerpieces: Surround with candles or greenery
- Bookshelf accents: Mix with other holiday decorations
Outdoor Placement
- Garden displays: Weather-resistant with proper sealing
- Walkway markers: Guide visitors to your door
- Porch decorations: Welcome guests with handmade charm
Care and Maintenance
Your painted rocks will last years with proper care:
Cleaning
Use soft, damp cloths. Avoid harsh chemicals. Gentle soap is fine if needed.
Storage
Keep in dry places during off-seasons. Wrap individually to prevent scratching.
Touch-ups
Keep leftover paint for future repairs. Small chips happen but are easily fixed.
Troubleshooting Common Issues
Paint Won’t Stick
Cause: Dirty or oily rock surface Solution: Clean thoroughly with soap and water first
Colors Look Muddy
Cause: Mixing too many colors together Solution: Use fewer colors, let layers dry completely
Brush Strokes Visible
Cause: Paint too thick or wrong brush type Solution: Thin paint slightly, use appropriate brush size
FAQs
Q: How long do painted rocks last outdoors? A: With proper sealing, expect 2-3 years of good condition. Weather affects longevity.
Q: Can I use regular house paint? A: Stick with acrylics. They’re designed for art projects and give better results.
Q: What if I make a mistake while painting? A: Let it dry, then paint over it. Acrylic paint covers well when dry.
Q: Do I need expensive brushes? A: Not necessarily. Good synthetic brushes work fine for most projects.
Q: Can kids do this project? A: Absolutely! It’s perfect for family activities. Supervise younger children with paints.
Q: How do I make my own nativity rock instructions easier? A: Start simple. Focus on basic shapes first. Details can always be added later.
Materials Cost Breakdown
Here’s what you can expect to spend:
| Category | Budget Option | Mid-Range | Premium |
|---|---|---|---|
| Paints | $8-12 | $15-25 | $30-50 |
| Brushes | $5-8 | $10-20 | $25-40 |
| Sealer | $3-5 | $8-12 | $15-25 |
| Total | $16-25 | $33-57 | $70-115 |
Remember, these supplies will make multiple projects. The cost per rock is actually quite low.
Building Your Rock Painting Skills
Start Simple
Don’t attempt complex scenes right away. Master basic shapes first. Build confidence with each project.
Practice Color Theory
Understanding how colors work together improves your results dramatically. Cool colors recede. Warm colors advance.
Study Real Nativity Scenes
Look at classical artwork for inspiration. Notice how artists handle lighting and composition.
Join Communities
Online groups share techniques and encouragement. Local art centers often have rock painting meetups.
Seasonal Timing and Planning
Best Months for Outdoor Collecting
Spring and summer offer the best rock hunting conditions. Rivers and beaches provide excellent options.
Project Timeline
Plan to start your easy nativity painted rocks in early November. This gives plenty of time for gifts or decorations.
Batch Processing
I paint multiple rocks simultaneously. While one dries, I work on another. Efficiency matters for larger projects.
Gift-Giving Ideas
Presentation Options
- Small gift boxes: Perfect for individual rocks
- Fabric pouches: Reusable and charming
- Clear display cases: Show off your artwork
- Handmade cards: Include care instructions
Personalization
Add names or dates to make gifts extra special. Small details show thoughtfulness.
Environmental Considerations
Eco-Friendly Options
Choose water-based paints when possible. They’re safer for the environment and your family.
Rock Collection Ethics
Only take rocks from appropriate locations. Respect private property and natural habitats.
Disposal
Dispose of paint water responsibly. Many communities have hazardous waste collection programs.
This how to paint a nativity on a rock journey transforms simple stones into meaningful art. Each rock tells a story. Each brushstroke adds character. The process is just as rewarding as the final result.
I hope this guide helps you create beautiful nativity rocks that bring joy for years to come. Remember, perfect technique isn’t required. Heart and enthusiasm matter more than flawless execution.