Easy North Pole Painted Rocks: A Complete Step-by-Step Guide
Picture this: tiny rocks transformed into magical winter wonderlands right in your hands. Easy north pole painted rocks bring Arctic charm to any space with minimal effort. These delightful creations spark joy and creativity in painters of all skill levels.

Creating Your Own North Pole Winter Wonderland
I absolutely love making these simple north pole painted rocks step by step because they capture the essence of winter magic. There’s something incredibly satisfying about transforming ordinary stones into miniature Arctic scenes.
When I first discovered this craft, I was amazed at how a few simple colors could create such enchanting results. The beauty lies in the simplicity – you don’t need fancy techniques or expensive materials to create something truly special.
These painted rocks make perfect gifts, decorations, or fun family activities. They’re ideal for beginners who want to explore rock painting without feeling overwhelmed by complex designs.

Materials Needed
Here’s a detailed breakdown of everything you’ll need for your north pole painted rock instructions:
| Material | Quantity | Purpose | Quality Tips |
|---|---|---|---|
| Rocks | 3-5 pieces | Base canvas | Choose smooth, flat stones about 2-3 inches wide |
| White Acrylic Paint | 1 bottle | Base coat and snow effects | Use high-quality acrylic for better coverage |
| Paste/Beige Acrylic Paint | 1 bottle | Penguin bodies and details | Titanium white works best for opacity |
| Red Acrylic Paint | 1 bottle | Santa hats and accents | Choose a vibrant red for festive appeal |
| Black Acrylic Paint | 1 bottle | Outlines and details | Use for crisp, clean lines |
| Varnish/Sealer | 1 bottle | Protection and shine | Clear acrylic sealer recommended |
| Flat Brush | 1 piece | Base coats and large areas | Size 6-8 works perfectly |
| Detail Brush | 1 piece | Fine lines and small details | Size 0-2 for precision work |
| Water Container | 1 cup | Brush cleaning | Change water frequently |
| Paper Towels | Several sheets | Cleanup and blotting | Essential for quick corrections |
Step-by-Step Process: How to Paint a North Pole on a Rock
Step 1: Prepare Your Base

First, I always start with a white base coat. This step is crucial for vibrant colors later.
Paint your entire rock with white acrylic paint using the flat brush. Make sure you cover every surface evenly. Don’t worry about perfection – the charm is in the handmade feel.
Let this dry completely. I usually wait about 30 minutes, but drying time depends on your climate and paint thickness.
Step 2: Add Your Color Scheme

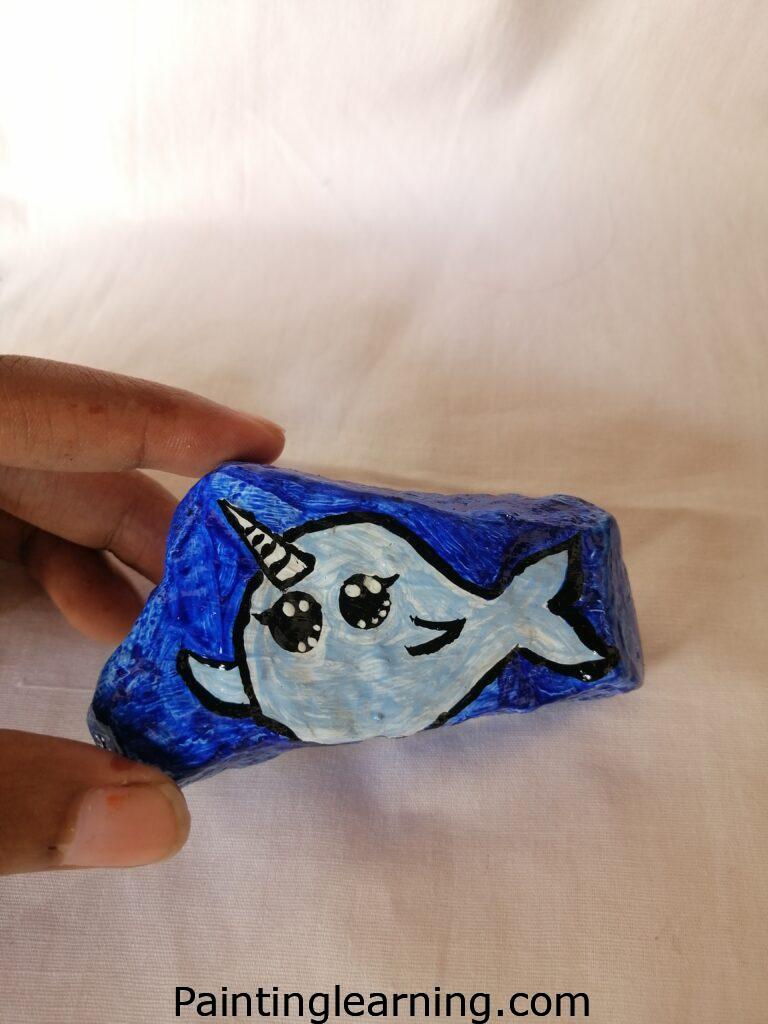
Now comes the fun part! Paint the rocks using your chosen colors to create your north pole scene.
For a classic penguin look, use the paste/beige color for the body. For Santa-themed rocks, incorporate that festive red. Apply these colors in sections, leaving the white base visible where you want snow effects.
Remember to let each color dry before adding the next. This prevents muddy colors and keeps your design crisp.
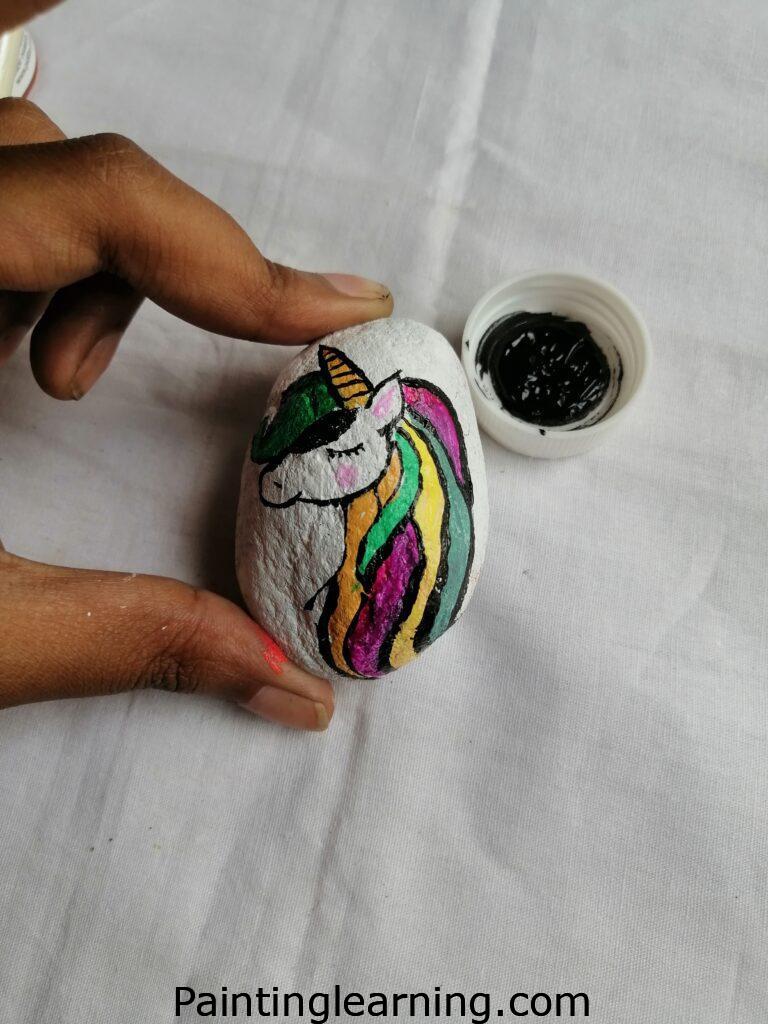
Step 3: Create Definition with Details

Using your detail brush, draw black lines to define your characters and add personality.
These lines transform your colored shapes into recognizable figures. Add eyes, beaks for penguins, or facial features for Santa figures. Take your time with this step – it’s where your rock truly comes to life.
Allow the black details to dry completely before moving to the final step.
Step 4: Seal Your Masterpiece

Apply varnish as a sealer to protect your artwork and give it a professional finish.
Use smooth, even strokes to cover the entire painted surface. The varnish not only protects but also enhances the colors, making them pop beautifully.
Now your north pole rocks are ready to brighten someone’s day!
Tips for Success
I’ve learned these tricks through years of rock painting:
- Clean your brushes thoroughly between colors to prevent muddying
- Work in good lighting to see your details clearly
- Let each layer dry completely before adding the next
- Practice your design on paper first if you’re nervous
- Keep a damp cloth nearby for quick cleanup of mistakes
- Store your paints properly to prevent them from drying out
- Use smooth, flat rocks for the best painting surface
Common Mistakes and How to Avoid Them
Rushing the Drying Process
Many beginners want to move quickly, but patience pays off. Wet paint will smear and create muddy colors. Always wait for complete drying between steps.
Using Too Much Paint
Thick paint takes longer to dry and can crack. Use thin, even coats instead. You can always add more layers if needed.
Neglecting the Base Coat
Skipping or rushing the white base coat results in dull, patchy colors. This foundation step is essential for vibrant results.
Forgetting to Seal
Unsealed painted rocks will fade and chip over time. Always finish with a quality sealer for longevity.
Using Poor Quality Brushes
Cheap brushes shed bristles and don’t hold paint well. Invest in decent brushes for better results and less frustration.
Similar Variations You Can Make
Once you’ve mastered the basic technique, try these exciting variations:
Polar Bear Rocks: Use white and black paint to create adorable polar bear faces. Add pink noses for extra cuteness.
Snowman Rocks: Stack painted rocks to create three-dimensional snowmen. Use orange for carrot noses and black for coal buttons.
Arctic Fox Rocks: Paint these clever creatures with white and gray tones. Their pointed ears and bushy tails make charming subjects.
Eskimo/Inuit Rocks: Create human figures in traditional Arctic clothing using earth tones and fur trim details.
Northern Lights Rocks: Use blues, greens, and purples to paint abstract aurora designs. These make stunning display pieces.
Ice Castle Rocks: Paint geometric shapes in blues and whites to create frozen palace designs.
Advanced Techniques for Experienced Painters
As you grow more confident, try these advanced methods:
Blending Techniques
Create smooth color transitions by blending wet paint. This works beautifully for sky backgrounds and dimensional effects.
Texture Creation
Use sponges or textured brushes to create interesting surface effects. This adds depth and visual interest to your rocks.
Layering for Depth
Build up multiple thin layers for richer colors and more complex designs. Each layer adds sophistication to your artwork.
Displaying Your North Pole Rocks
These charming creations deserve proper presentation:
- Group them together for maximum impact
- Create seasonal displays that change throughout the year
- Use them as table centerpieces during winter gatherings
- Give them as thoughtful handmade gifts
- Hide them around your garden for delightful surprises
Troubleshooting Common Issues
Paint Won’t Stick
Clean your rocks thoroughly with soap and water before painting. Oils from handling can prevent proper adhesion.
Colors Look Muddy
This usually happens when paint layers aren’t dry. Always wait between coats and clean brushes thoroughly.
Brush Strokes Are Visible
Use higher quality paint and apply in thin, even coats. Sometimes a second coat eliminates brush marks.
Sealer Looks Cloudy
Apply sealer in thin coats and avoid overworking the surface. Some sealers need specific temperature conditions to cure properly.
Caring for Your Painted Rocks
Proper care ensures your artwork lasts:
- Keep them indoors for longest life
- Dust gently with a soft brush
- Avoid direct sunlight which can fade colors
- Handle with clean hands to prevent oil transfer
- Store carefully if not displaying
The Joy of Rock Painting
There’s something magical about holding a painted rock. It represents time, creativity, and intention. Every brushstroke carries meaning.
I’ve found that painting rocks is incredibly meditative. The focus required quiets the mind and reduces stress. It’s therapy disguised as art.
Building Your Rock Painting Skills
Start with these simple north pole designs, then gradually tackle more complex projects. Each rock teaches you something new about color, technique, or composition.
Join online communities where rock painters share ideas and encouragement. The supportive atmosphere helps beginners gain confidence quickly.
Environmental Considerations
Always use non-toxic paints and sealers, especially if rocks might end up outdoors. Consider the environment when choosing materials and disposal methods.
Some rock painters participate in “rock hiding” communities where painted rocks are left for others to find. It’s a beautiful way to spread joy anonymously.
FAQs
Q: What type of rocks work best for painting? A: Smooth, flat rocks like river stones or beach pebbles work perfectly. Avoid porous rocks that absorb too much paint.
Q: Can I use regular house paint instead of acrylic? A: Acrylic paint is specifically designed for crafts and provides better coverage and durability on rocks.
Q: How long does it take to complete one rock? A: Including drying time, plan for about 2-3 hours total, though actual painting time is much shorter.
Q: Are painted rocks safe for children? A: Yes, when using non-toxic materials and with proper supervision. It’s a wonderful family activity.
Q: Can painted rocks stay outside? A: With proper sealing, they can withstand some weather, but indoor display ensures longest life.
Q: What if I make a mistake? A: Acrylic paint can be painted over once dry. Minor mistakes often add character to handmade items.
Q: Do I need artistic experience? A: Not at all! These simple designs are perfect for beginners. The joy is in the creating, not perfection.
Conclusion
Easy north pole painted rocks offer a perfect introduction to the wonderful world of rock painting. Through this simple step-by-step process, you’ve learned to transform ordinary stones into extraordinary winter treasures.
Whether you’re creating gifts, decorations, or simply enjoying a relaxing creative activity, these charming north pole rocks bring joy to both maker and viewer. The techniques you’ve learned here form the foundation for countless future rock painting adventures.