Easy Glitter Butterfly Painted Rocks Guide
Ever looked at a plain rock and wondered if it could sparkle? That’s where easy glitter butterfly painted rocks come alive.
I’ve tried many rock painting projects, but this one feels magical. It’s simple yet eye-catching, and anyone can do it with just a few supplies.
And here’s the best part—you’ll walk away with a shimmering butterfly that feels like it belongs in a fairy garden. Let’s get started.
What Are Glitter Butterfly Rocks?
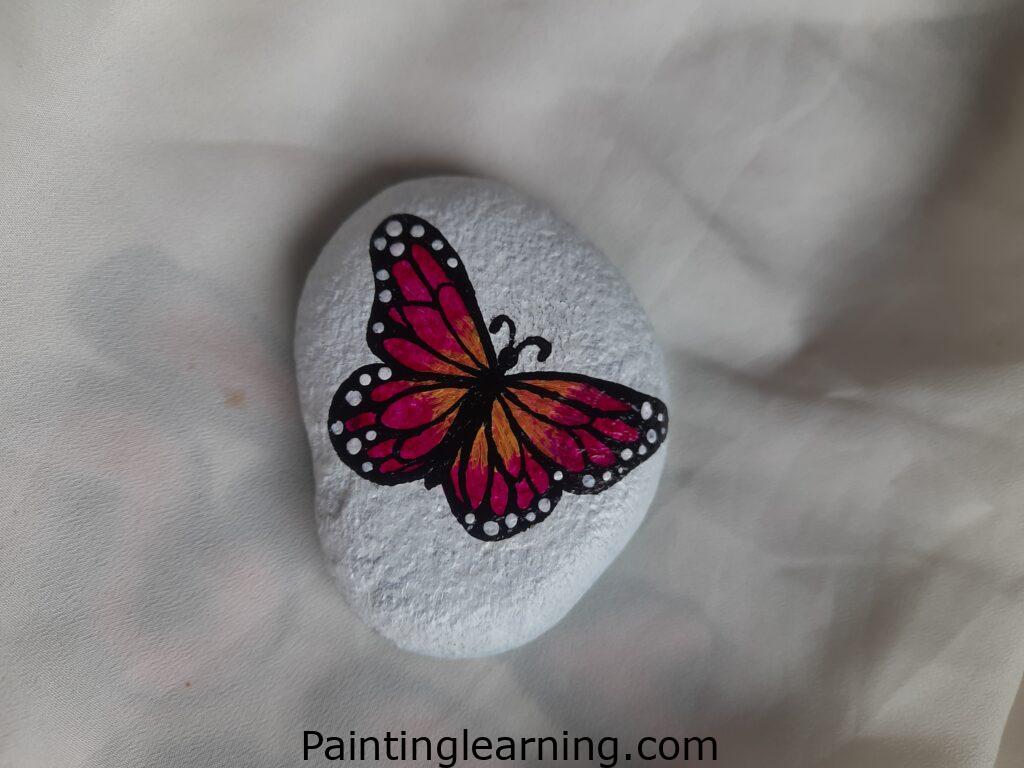
Glitter butterfly rocks are smooth stones transformed into glowing works of art. With bold colors, delicate butterfly wings, and a sprinkle of shimmer, these little creations brighten up any space.
They aren’t just decorations. They can be:
- A thoughtful handmade gift.
- A whimsical garden addition.
- A calming art project for relaxation.
And trust me, when the sunlight hits the glitter details, these butterflies look like they’re ready to fly away.
Key Terms Explained
- Base Coat: The first layer of paint that prepares the rock surface for designs.
- Detail Brush: A fine-tipped paintbrush used for drawing thin lines and delicate shapes.
- Varnish: A clear sealer that protects the paint and gives your rock a polished finish.
- Accent Colors: Secondary shades (like yellow or purple) that make the butterfly design stand out.
Materials Needed
Here’s a complete breakdown of what you’ll need. I’ve made a detailed table so you can plan better:
| Material | Description | Purpose | Notes |
|---|---|---|---|
| Rocks | Smooth, flat stones | Base surface | Wash and dry before painting |
| Acrylic Colors | White, Black, Yellow, Deep Brilliant Purple | Main paints for design | Choose high-quality paints for best finish |
| Varnish | Clear sealer | Protects design and adds shine | Spray or brush-on types work |
| Paint Brushes | Flat brush & Detail brush | Applying base coats & fine details | Keep separate for light and dark paints |
| Pencil | Regular graphite | For sketching butterfly outline | Use lightly so it doesn’t show through |
Simple Glitter Butterfly Painted Rocks Step by Step
Here’s the part you’ve been waiting for—the process. If you’ve ever wondered how to paint a glitter butterfly on a rock, this guide has you covered.
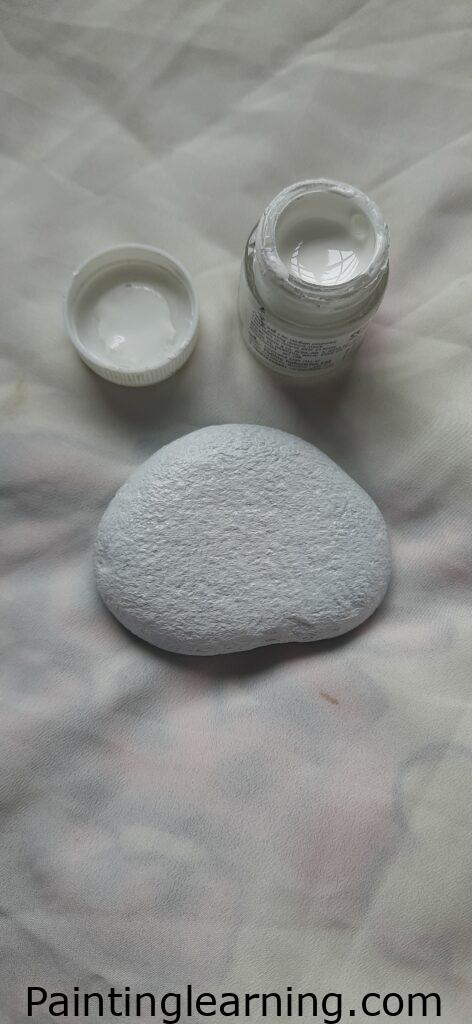
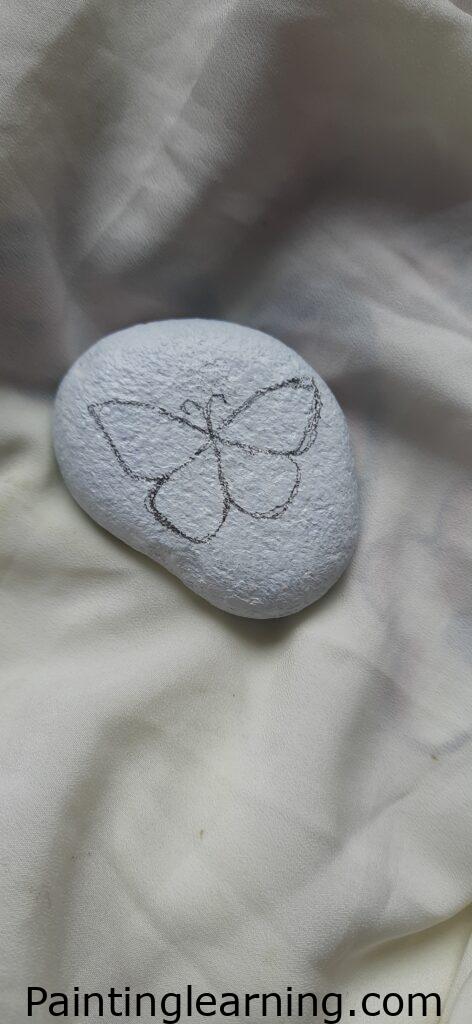
Step 1: Base Color
Paint the rock white using a flat brush. Let it dry completely. Then, use a pencil to lightly draw the butterfly shape.
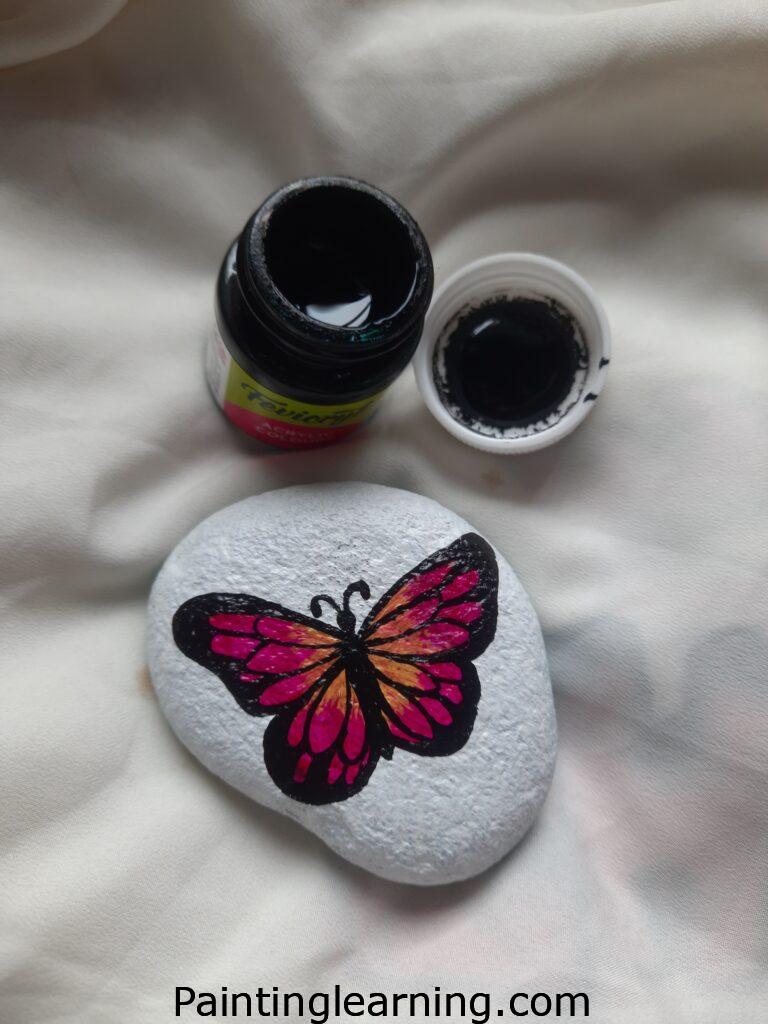
Step 2: Add Main Colors
Take deep brilliant purple and fill in the butterfly wings. Let it dry. Next, add yellow to the middle section of the butterfly and let it dry again.


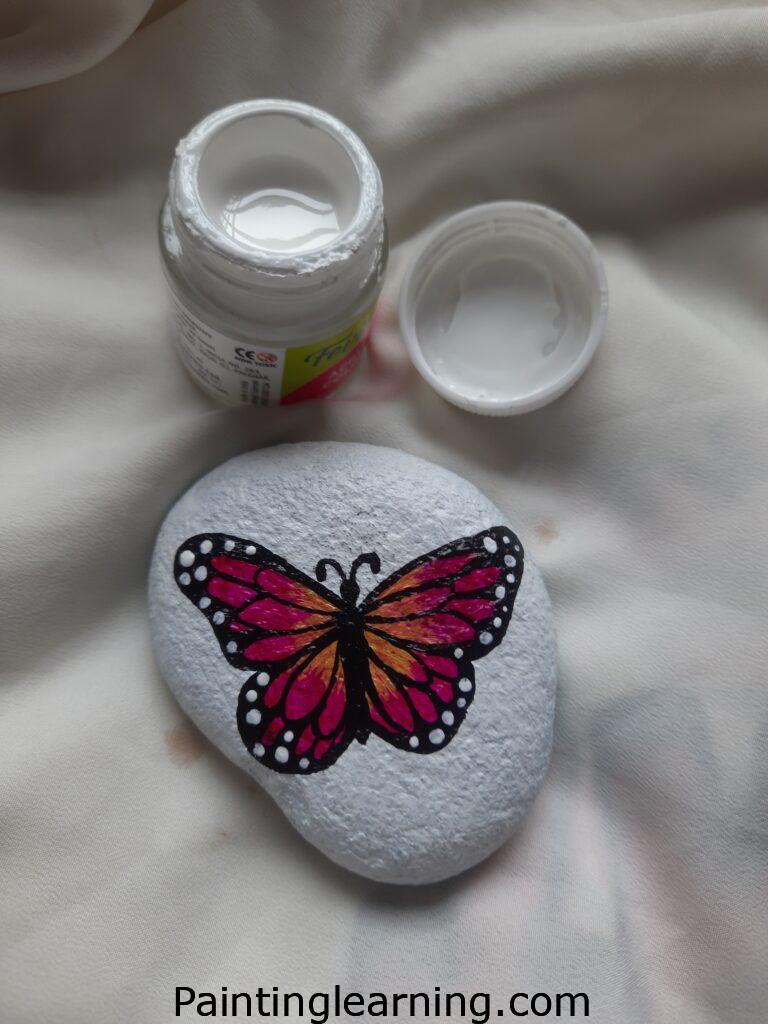
Step 3: Outline and Glitter Effect
Using the detail brush, outline the butterfly with black paint. After it dries, add small white dots along the black border. This gives the butterfly that glittery vibe.
Step 4: Seal It In
Apply varnish over the entire rock once everything is dry. This not only protects the design but also makes it shine.
Now your glitter butterfly rocks are ready to display.
Tips for Success
From my own experience, here are some tips to make your butterflies pop:
- Use thin layers of paint. Thick coats crack easily.
- Always let each color fully dry before adding another.
- Smooth, flat rocks work best for butterfly designs.
- A glossy varnish will make colors appear more vibrant.
- Practice butterfly shapes on paper before sketching on the rock.
Common Mistakes and How to Avoid Them
I’ve made a few blunders myself, so here’s how you can dodge them:
- Skipping the base coat → Colors won’t stand out. Always start with white.
- Not drying between layers → Colors smudge together. Patience is key.
- Using too much varnish → Rock looks cloudy. Apply a thin, even coat.
- Drawing with heavy pencil marks → They might show under the paint. Keep it light.
Similar Variations You Can Try
Once you’ve done the basic butterfly, you can branch out:
- Rainbow Butterflies: Blend multiple colors on each wing for a gradient effect.
- Glitter Accents: Add glitter glue instead of just white dots for extra sparkle.
- Garden Themes: Paint flowers around the butterfly for a more detailed rock.
- Seasonal Designs: Use autumn shades (orange, red, gold) or spring pastels.
Each variation gives your rock a whole new personality.
FAQs
Q: Can kids make glitter butterfly rocks too?
Yes! Just supervise the varnish step since it can have strong fumes.
Q: Do I need expensive paints?
No. Standard acrylic paints work great as long as they’re good quality.
Q: How long will these rocks last outdoors?
With a good varnish seal, they can last months in the garden without fading.
Q: What kind of rocks should I choose?
Smooth, flat ones. River rocks or store-bought craft rocks work best.
Final Thoughts
Painting easy glitter butterfly painted rocks is more than just an art project. It’s calming, creative, and leaves you with a piece of handmade beauty.
Whether you’re a beginner or an experienced crafter, following these glitter butterfly painted rock instructions will guide you to a rewarding result. And if you try it out, I’d love to hear how your butterflies turned out.