Easy Ladybug Rock Painting: Transform Ordinary Stones into Adorable Garden Treasures
Ever stared at a plain rock and wondered how to turn it into something magical? I’ve been there too, holding smooth stones and dreaming of transformation. Today, I’m sharing my favorite simple ladybug rocks step by step process that’ll have you creating charming garden decorations in no time.
Rock painting brings out the artist in everyone, regardless of skill level. These tiny spotted beetles make perfect subjects for beginners. The result? Delightful ladybug rocks that’ll brighten any space.
What Are Ladybug Rocks?
Ladybug rocks are painted stones designed to look like those adorable red beetles we love spotting in our gardens. I started making these little beauties three years ago, and honestly, I can’t stop creating them.
The concept is beautifully simple. You take ordinary rocks and transform them into miniature ladybugs using basic painting techniques. These aren’t just decorations – they’re conversation starters, garden accents, and perfect gifts for nature lovers.
Painted Rock Art : The practice of decorating stones with various designs using acrylic paints and protective sealers.
Ladybug Design : A specific rock painting pattern featuring the classic red body, black spots, and distinctive beetle shape.
Base Coat : The first layer of paint applied to prepare the rock surface for detailed work.
Materials Needed
Here’s everything you’ll need for your ladybug rock painting adventure. I’ve organized this into a detailed breakdown so you won’t miss anything.
| Category | Item | Quantity | Purpose | Quality Level | Estimated Cost |
|---|---|---|---|---|---|
| Base Materials | Smooth rocks | 3-5 pieces | Canvas for painting | Medium to large, flat surface | $0-5 |
| Primary Paints | White acrylic paint | 1 bottle | Base coat coverage | Artist quality preferred | $2-4 |
| Red acrylic paint | 1 bottle | Ladybug body color | Bright, vibrant shade | $2-4 | |
| Black acrylic paint | 1 bottle | Details and outlines | High coverage formula | $2-4 | |
| Blue acrylic paint | 1 bottle | Optional accent color | Any shade works | $2-4 | |
| Tools | Flat brush | 1 piece | Base coat application | 1/2 inch width ideal | $3-6 |
| Detail brush | 1 piece | Fine line work | Size 0 or 00 | $2-5 | |
| Pencil | 1 piece | Sketching design | Standard #2 pencil | $1 | |
| Finishing | Varnish/Sealer | 1 bottle | Protection and shine | Outdoor formula recommended | $4-8 |
| Optional | Palette | 1 piece | Paint mixing | Paper plate works too | $1-3 |
| Water container | 1 piece | Brush cleaning | Any small jar | $0 |
Step-by-Step Ladybug Rock Painting Instructions
I’ve broken down the entire process into manageable steps. Trust me, following these ladybug rock painting instructions will give you professional-looking results every time.
Step 1: Prepare Your Base
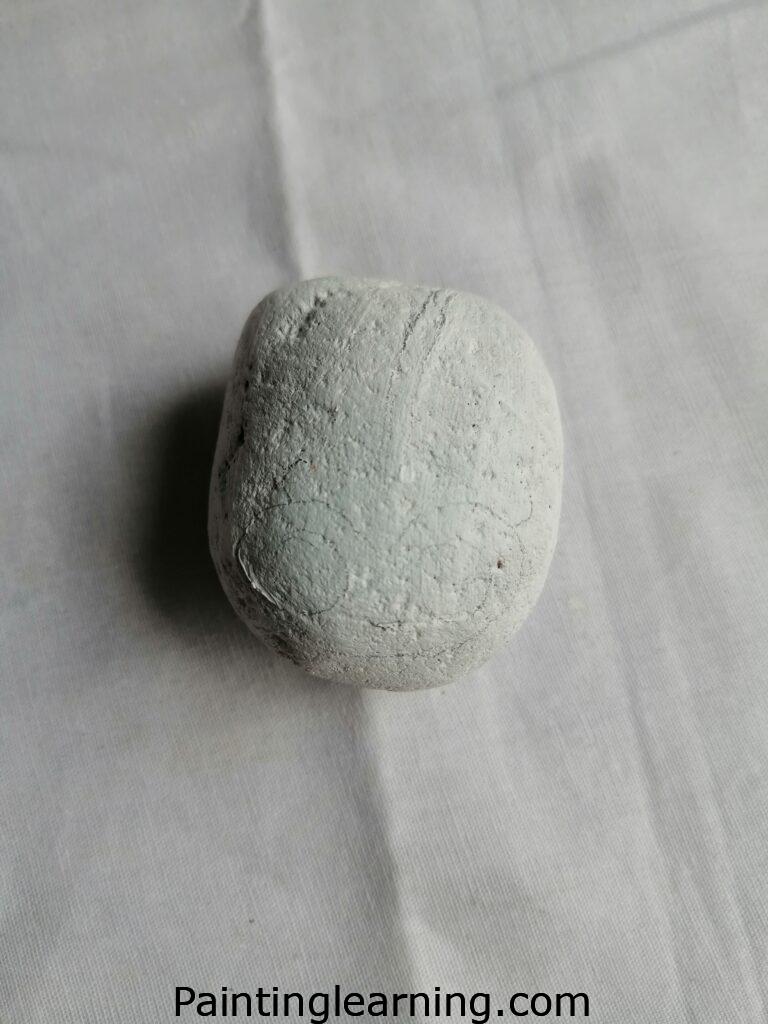
Start by painting your entire rock with white paint. This creates a clean canvas for your ladybug design.
I learned this the hard way – skipping the white base makes your colors look muddy. Let the white dry completely. This usually takes about 30 minutes, but I recommend waiting an hour to be safe.
Once dry, use your pencil to lightly sketch the ladybug outline. Don’t worry about perfection here. We’re just creating a guide.
Step 2: Paint the Ladybug Body

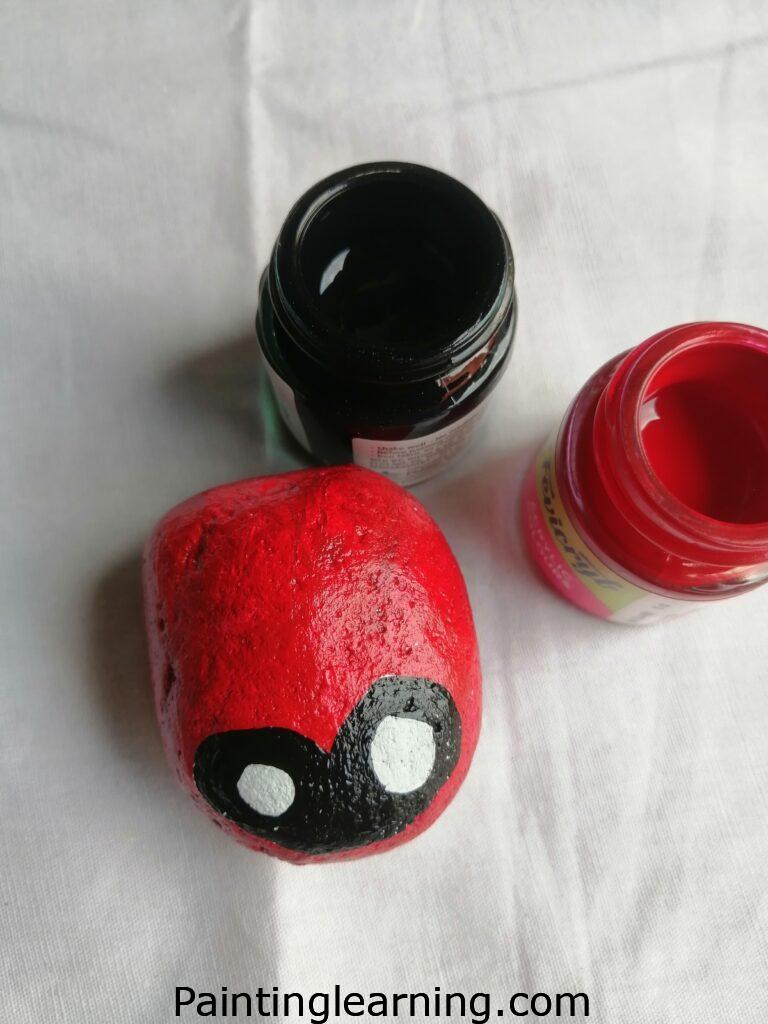
Now for the fun part! Paint the ladybug’s body in the center of your rock using bright red paint.
The shape should be oval, slightly wider at the top. I like to leave a small white space at the top for the head area. This creates that classic ladybug silhouette we all recognize.
Apply the red paint evenly, and don’t worry if you go slightly outside your pencil lines. We’ll clean that up later.
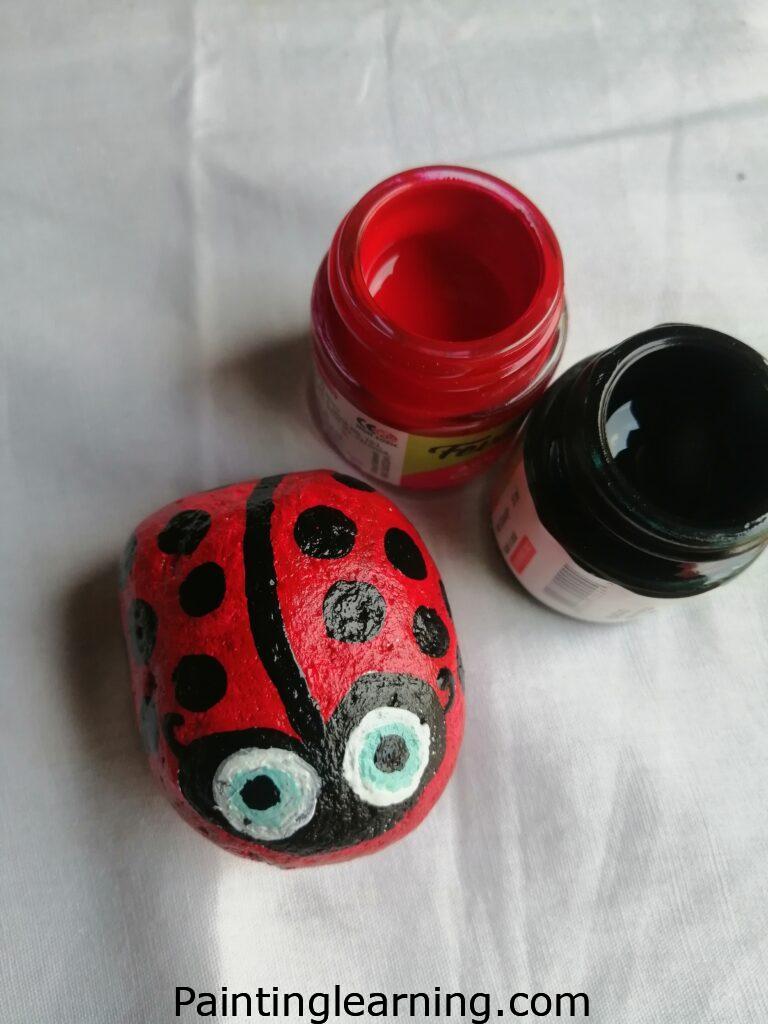
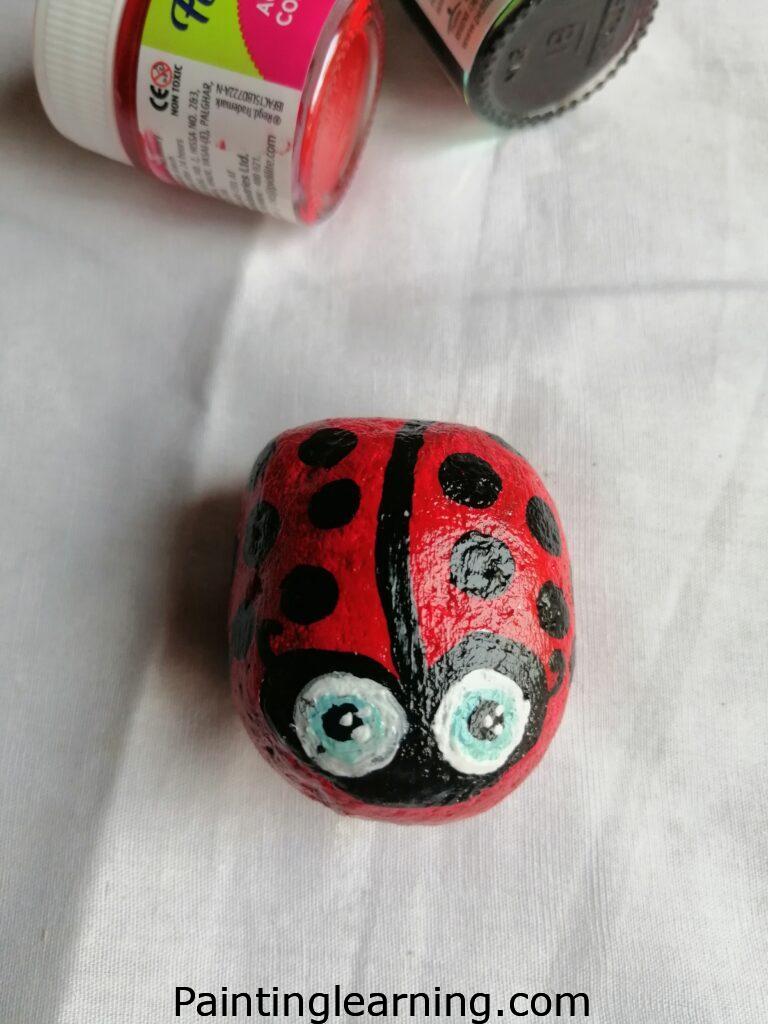
Step 3: Add the Details
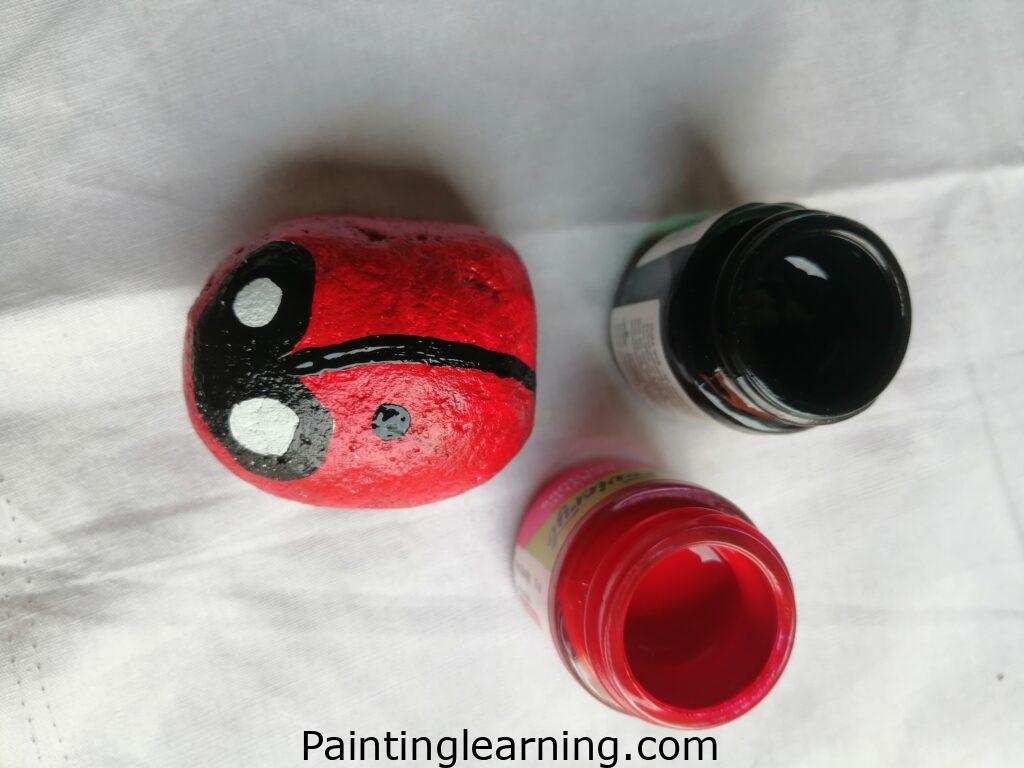
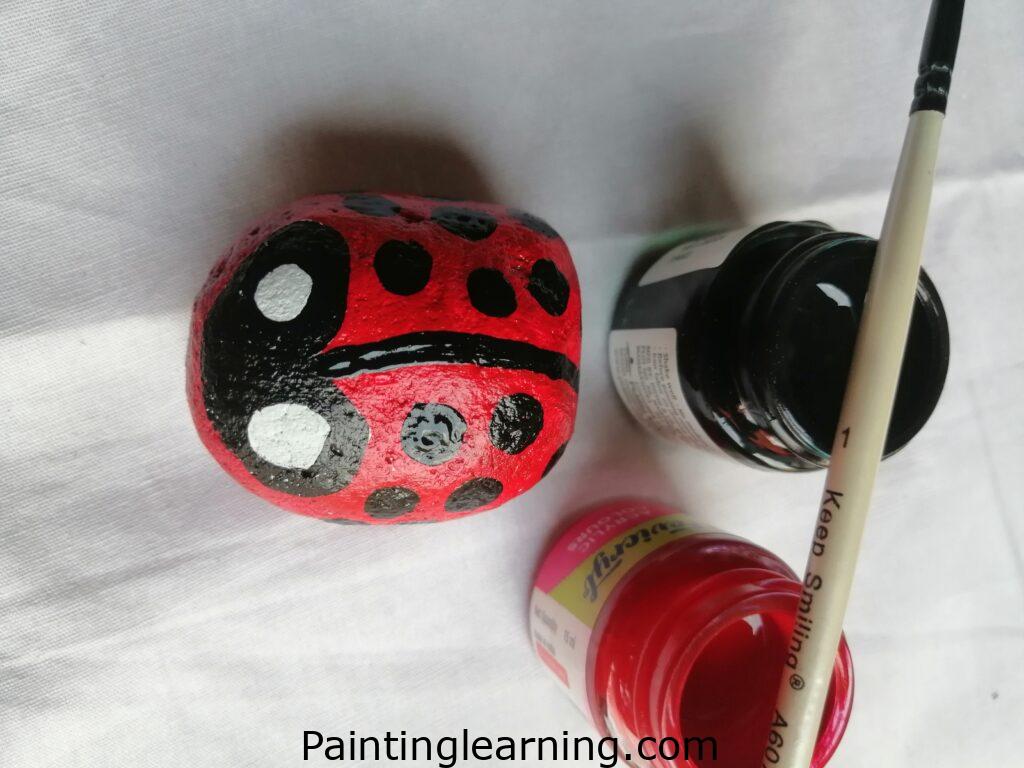
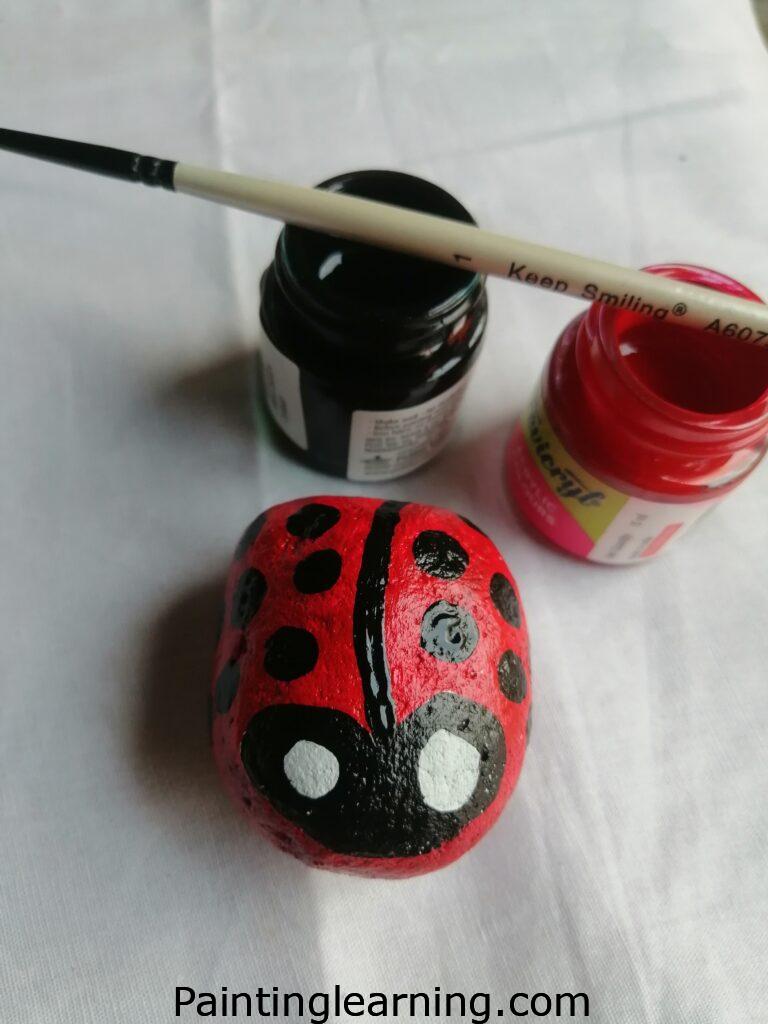
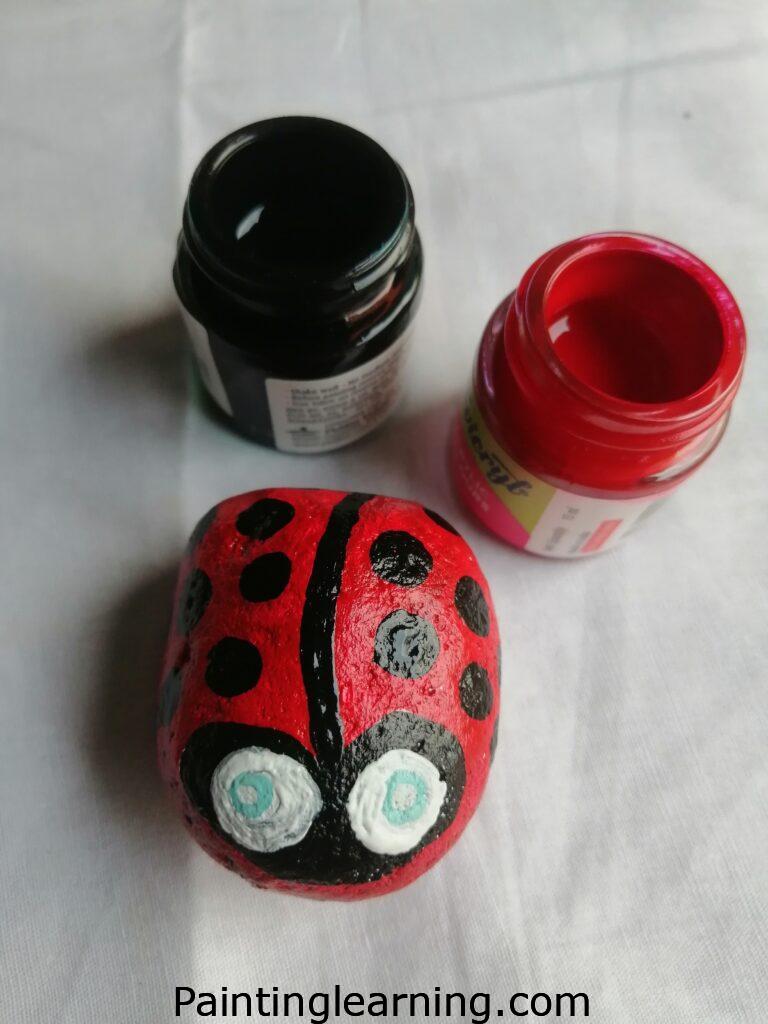

Here’s where your detail brush becomes your best friend. Using black paint, carefully draw the center line down the middle of the red body. This represents where the ladybug’s wings meet.
Next, add the black spots. I typically use 3-4 spots on each side, but you can vary this. Make them different sizes for a more natural look.
Paint the head area black, creating a small semicircle at the top of your design.
Step 4: Final Touches and Sealing
Let everything dry completely – this is crucial. Once dry, apply your varnish or sealer using smooth, even strokes.
The varnish protects your artwork from weather and gives it a professional finish. I always apply two thin coats rather than one thick coat for better coverage.
Your ladybug rock is now ready to charm everyone who sees it!
Tips for Success
After painting hundreds of these little creatures, I’ve learned some tricks that make the process smoother and more enjoyable.
Choose the Right Rocks Look for stones that are relatively flat and smooth. River rocks work wonderfully, but even rocks from your backyard can work if they have a decent painting surface.
Layer Your Paints Thin coats dry faster and look more professional than thick, gloopy applications. If you need more coverage, add a second thin coat instead of trying to cover everything in one go.
Keep Your Brushes Clean Rinse your brushes frequently while painting. This prevents colors from getting muddy and extends the life of your brushes.
Practice Makes Perfect Don’t expect your first ladybug to be perfect. I still remember my first attempt – it looked more like a red blob than a beetle! Each rock you paint will be better than the last.
Common Mistakes and How to Avoid Them
I’ve made plenty of mistakes along the way. Here are the most common ones and how to sidestep them entirely.
Mistake 1: Skipping the Base Coat Many beginners jump straight to the red paint. This creates uneven color and a less professional appearance. Always start with white.
Mistake 2: Working with Wet Paint Patience is key in rock painting. If you add details before the base is completely dry, colors will bleed and create a messy appearance.
Mistake 3: Using Too Much Paint Thick paint takes forever to dry and can crack or peel. Use thin, even coats for the best results.
Mistake 4: Forgetting to Seal Your beautiful artwork won’t last outdoors without proper sealing. Don’t skip this final step!
Similar Variations You Can Create
Once you’ve mastered the basic how to paint a ladybug on a rock technique, you can explore these delightful variations.
Butterfly Rocks Use the same base technique but extend the design into wing shapes. Add different colors and patterns for variety.
Bee Rocks Replace the red with yellow and add black stripes instead of spots. Perfect for creating a garden insect family!
Turtle Rocks Use green paint and create shell patterns. These work especially well on more dome-shaped rocks.
Caterpillar Rocks Paint several small rocks in bright colors and arrange them in a line. Each rock becomes a segment of the caterpillar.
Displaying Your Ladybug Rocks
Your finished creations deserve proper showcasing. I love placing mine throughout my garden beds where they peek out between flowers.
They also make wonderful gifts for friends and family. I’ve given them as housewarming presents, teacher gifts, and even wedding favors.
Consider creating a small rock garden specifically for your painted stones. This gives you a dedicated space to display your growing collection.
Seasonal Considerations
Different seasons offer unique opportunities for your ladybug rock projects.
Spring Perfect timing for garden placement as flowers begin to bloom. Your ladybugs will complement the fresh green growth.
Summer Ideal painting weather with good drying conditions. You can work outdoors and enjoy the creative process in nature.
Fall Create autumn-themed variations using oranges and browns while maintaining the ladybug shape.
Winter Indoor painting time! Perfect for creating gifts or building up your collection for spring placement.
FAQs
Q: What type of rocks work best for ladybug painting? A: Smooth, flat river rocks or beach stones work wonderfully. Look for stones about 2-4 inches in diameter with minimal texture.
Q: Can I use regular house paint instead of acrylic? A: Acrylic paint adheres better to rock surfaces and provides more vibrant colors. While house paint might work, acrylics give better results.
Q: How long do painted rocks last outdoors? A: With proper sealing, painted rocks can last 2-3 years outdoors. Indoor rocks will last indefinitely.
Q: Can children safely do this project? A: Absolutely! This project is perfect for kids aged 5 and up with adult supervision. Use non-toxic paints and ensure proper ventilation.
Q: What if I make a mistake while painting? A: Let the mistake dry completely, then paint over it with your base color and start again. Acrylic paint is very forgiving.
Q: Do I need expensive art supplies? A: Not at all! Basic acrylic paints from any craft store work perfectly. The key is technique, not expensive materials.
Advanced Techniques
Once you’ve mastered the basics, try these advanced approaches to elevate your ladybug rock art.
Gradient Effects Blend red and pink paints while wet to create subtle color variations across the ladybug body.
Dimensional Details Use small amounts of paint to create slightly raised spots and features for a more three-dimensional appearance.
Realistic Textures Add tiny white highlights to simulate the natural shine of a ladybug’s shell.
Troubleshooting Common Issues
Paint Won’t Stick Your rock might be too smooth or dirty. Clean with rubbing alcohol and let dry completely before painting.
Colors Look Muddy You’re probably mixing colors unintentionally. Clean your brush thoroughly between colors.
Varnish Looks Streaky Apply varnish in thin, even coats. Work quickly to maintain a wet edge and avoid brush marks.
Creating easy ladybug rocks has become one of my favorite creative outlets. There’s something magical about transforming ordinary stones into charming garden companions that never fails to bring joy.
The beauty of this simple ladybug rocks step by step process lies in its accessibility – anyone can create these delightful decorations with basic materials and a little patience. Whether you’re decorating your own garden or creating gifts for loved ones, these painted treasures will bring smiles for years to come.