Easy Shamrock Painted Rocks: Your Complete Guide to Creating Lucky Charms
Ever stared at a plain rock and wondered how to transform it into something magical? I’ve been there too.
Rock painting has this incredible way of turning ordinary stones into extraordinary treasures. Today, I’m sharing my favorite project that never fails to bring smiles.
What Are Shamrock Painted Rocks?
Shamrock painted rocks are delightful little art pieces that capture the essence of Irish luck and charm. These aren’t just painted stones – they’re miniature canvases that tell a story of hope, fortune, and creativity.
I love how these simple shamrock painted rock instructions can transform any ordinary pebble into a conversation starter. Whether you’re planning for St. Patrick’s Day, creating garden decorations, or simply want to spread some positivity, these lucky rocks deliver every time.
The beauty of this craft lies in its simplicity. You don’t need expensive materials or years of artistic training. Just a few basic supplies and the willingness to get your hands a little messy.
Materials Needed
Here’s your complete shopping list for creating stunning shamrock rocks:
| Material | Type/Color | Purpose | Alternative Options |
|---|---|---|---|
| Rocks | Smooth, flat surfaces | Base canvas | River rocks, beach stones, purchased craft rocks |
| Acrylic Paint – White | Basic white | Base coat for vibrant colors | Gesso primer, white craft paint |
| Acrylic Paint – Green | Standard green | Main shamrock color | Kelly green, forest green |
| Acrylic Paint – Deep Green/Olive | Darker green shade | Shading and depth | Mix green with brown, hunter green |
| Acrylic Paint – Black | Pure black | Outline and details | Dark brown for softer lines |
| Varnish | Clear protective coat | Sealing and protection | Mod Podge, clear acrylic sealer |
| Flat Brush | Medium size | Base coating | Foam brush, wide artist brush |
| Detail Brush | Fine tip | Precision work | Liner brush, small round brush |
| Pencil | Standard #2 | Initial sketching | Washable marker, charcoal |
| Paper Towels | Absorbent | Cleanup | Cloth rags, sponges |
| Water Container | Clean water | Brush cleaning | Any small bowl or jar |
Simple Shamrock Painted Rocks Step by Step
Step 1: Prepare Your Base
Start with painting your rock completely white. This base color is crucial – it makes all your other colors pop with vibrancy.
Let me tell you why this step matters so much. I learned this the hard way when I skipped the white base on my first attempt. The result? Dull, muddy colors that looked nothing like the bright shamrocks I envisioned.
Apply the white paint evenly across your entire rock surface. Don’t worry about perfection – rock painting is forgiving. Once dry, use your pencil to sketch the shamrock design. Keep it simple: three heart-shaped leaves connected at the bottom with a small stem.
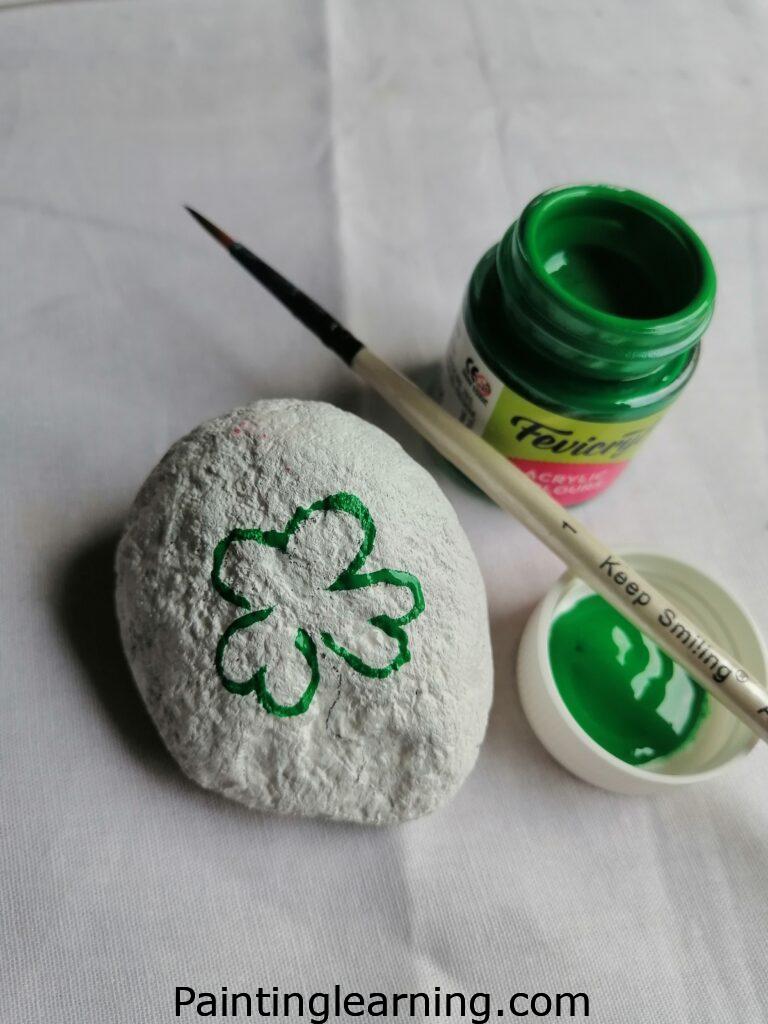
Step 2: Paint the Shamrock Leaves
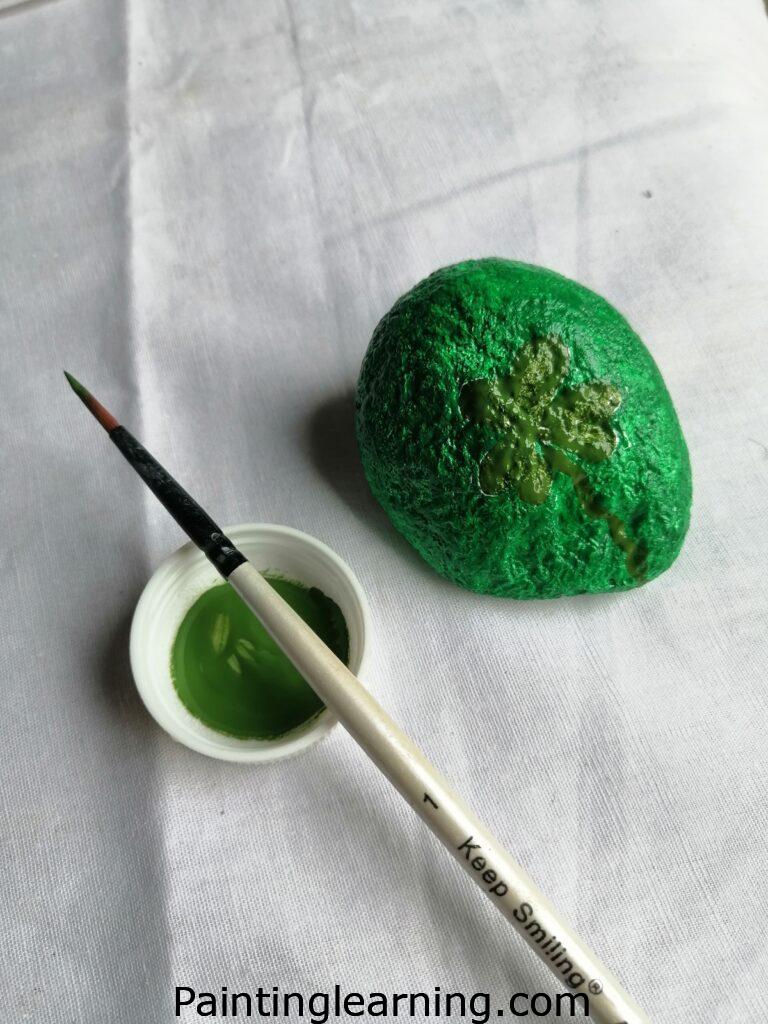
Now comes the fun part – bringing your shamrock to life with color!
Paint the middle leaf first using your olive green or deep green color. This darker shade creates depth and makes your shamrock look more realistic. Next, fill in the two side leaves with your regular green paint.
I like to work from the center outward because it helps me maintain symmetry. Don’t stress if your leaves aren’t perfectly identical – real shamrocks aren’t either!
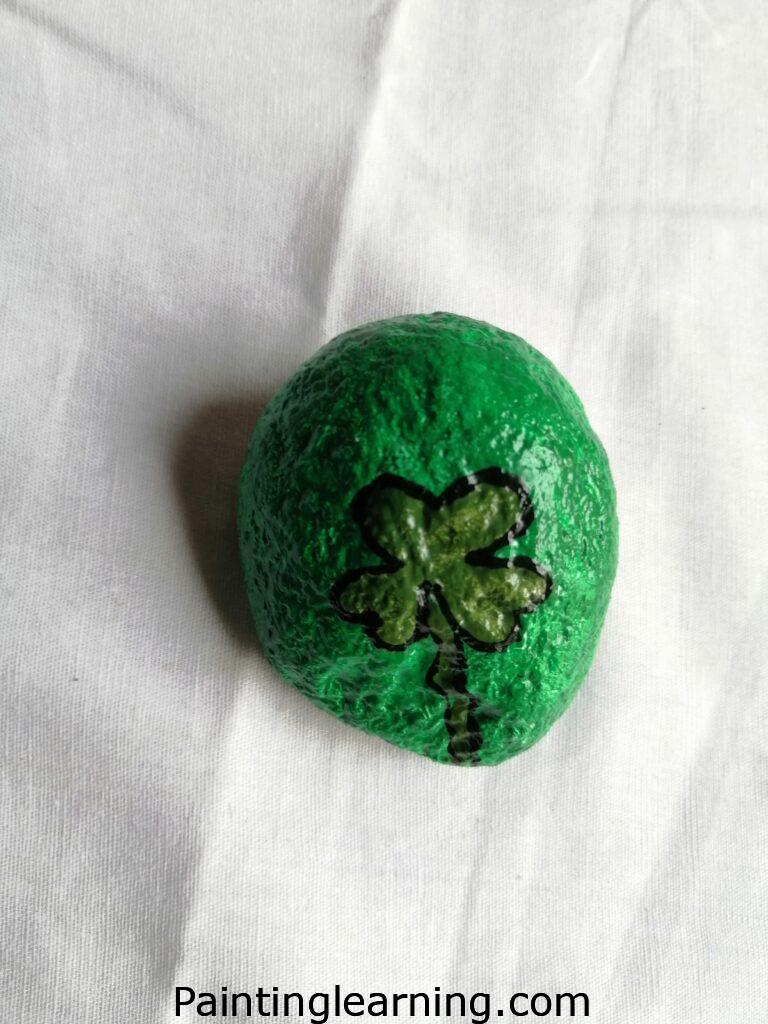
Step 3: Add the Black Outlines
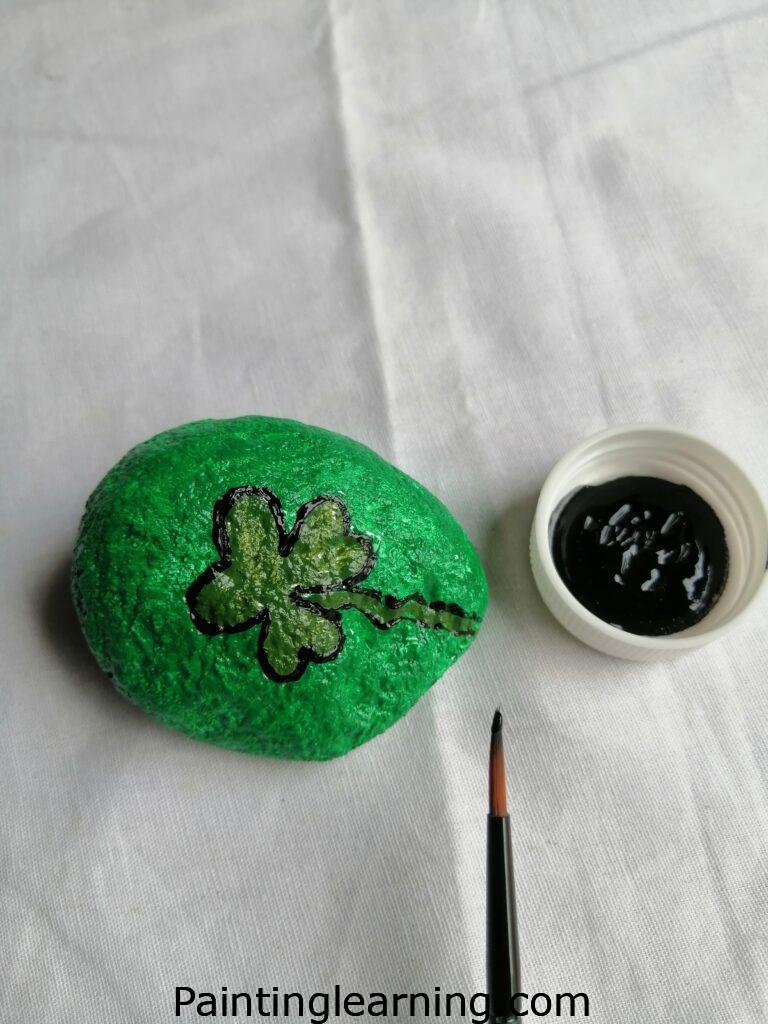
Using your detail brush, carefully draw black lines around each leaf. This step transforms your painted shamrock from amateur to professional-looking.
Take your time here. Steady hands make all the difference, but if you mess up, don’t panic. Acrylic paint is forgiving – you can always paint over mistakes once they dry.
Add a simple stem at the bottom connecting all three leaves. Some people like to add small veins inside each leaf, but I find that less is often more with rock painting.
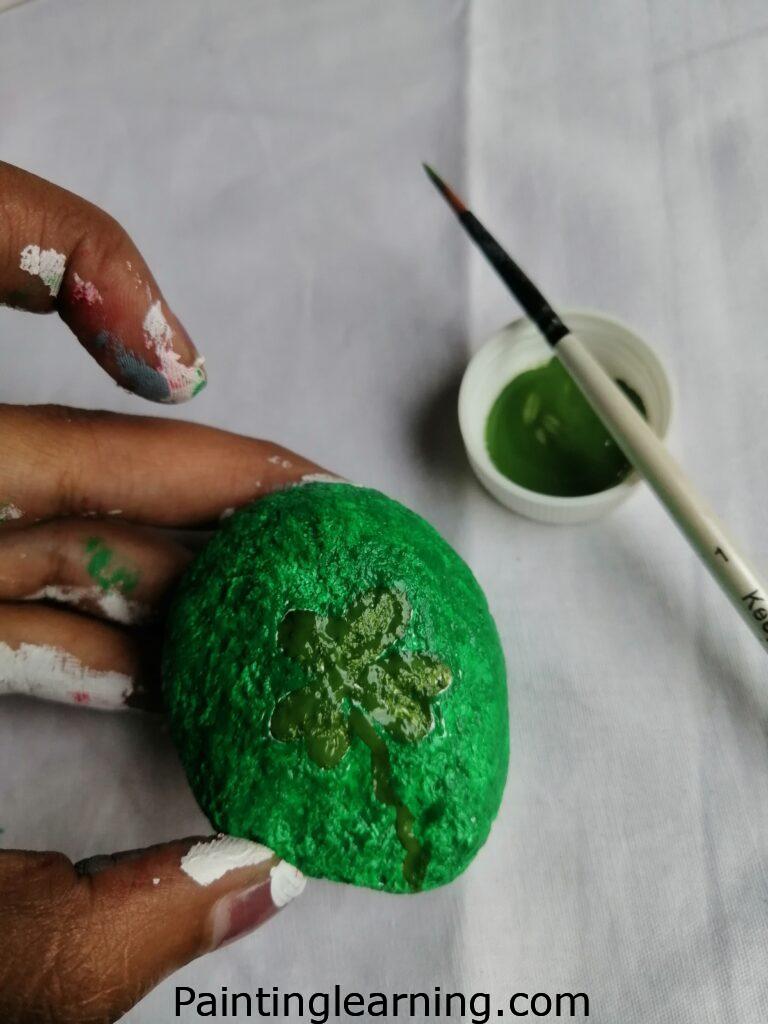
Step 4: Seal and Protect
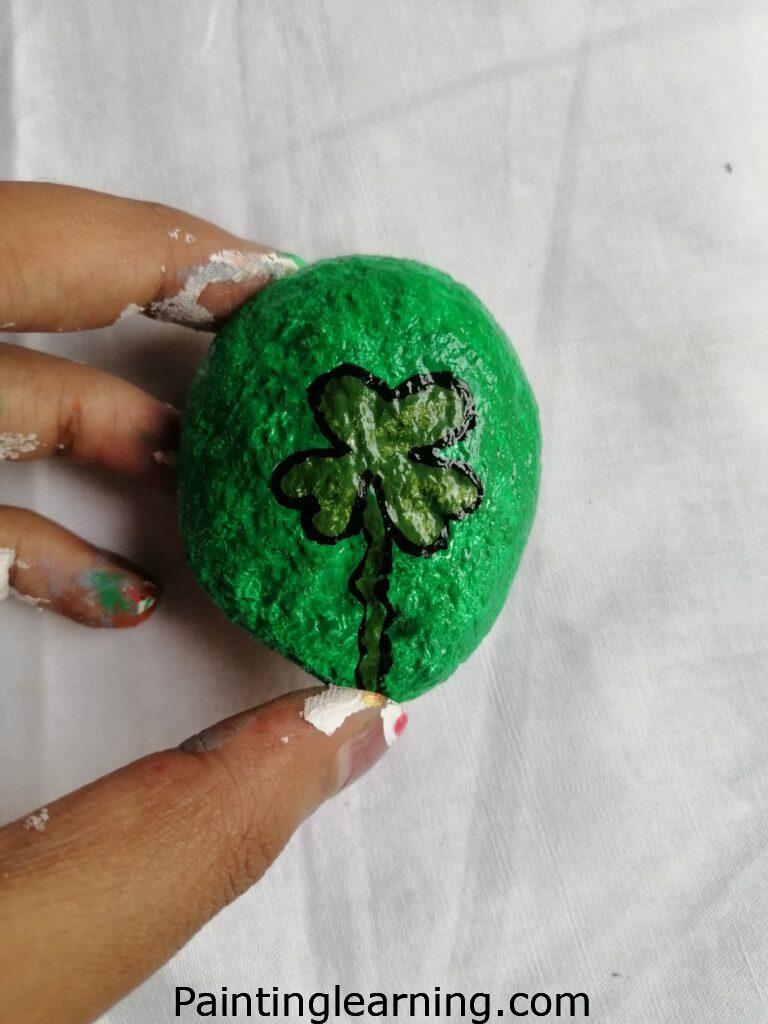
Once everything is completely dry, apply your varnish or clear sealer. This final step protects your artwork from weather, handling, and fading.
I always apply two thin coats rather than one thick coat. It prevents drips and creates a more even finish. Your shamrock painted rocks are now ready to spread some Irish luck wherever they go!
Tips for Success
Start Small, Think Big : Begin with simple designs before attempting complex shamrocks. I’ve seen too many people get frustrated trying to create masterpieces on their first try.
Quality Brushes Make a Difference : Invest in at least one good detail brush. Cheap brushes shed bristles and make clean lines nearly impossible.
Practice Color Mixing : Don’t be afraid to blend your greens. Some of my best shamrocks feature custom green shades I mixed myself.
Work in Good Lighting : Natural light shows true colors. I always paint near a window when possible.
Keep Paint Moist : Acrylic paint dries quickly. Keep a spray bottle handy to mist your palette occasionally.
Common Mistakes and How to Avoid Them
Painting on Dirty Rocks
I see this mistake constantly. Always clean your rocks thoroughly before painting. Soap, water, and a good scrub remove dirt and oils that prevent paint adhesion.
Rushing the Drying Process
Patience pays off in rock painting. Each layer needs to dry completely before adding the next. I usually wait at least 30 minutes between coats.
Using Too Much Paint
Thick paint creates uneven surfaces and takes forever to dry. Multiple thin coats always look better than one thick glob.
Skipping the Sealer
Unsealed rocks fade and chip within weeks. That beautiful shamrock you spent hours creating deserves protection.
Inconsistent Leaf Sizes
Draw your shamrock in pencil first. This simple step prevents lopsided leaves and wonky proportions.
Similar Variations You Can Make
Four-Leaf Clover Rocks
Add an extra leaf for extra luck! These make perfect gifts and conversation pieces.
Shamrock Family Rocks
Create different sized shamrocks on one rock – like a parent shamrock with baby shamrocks around it.
Rainbow Shamrock Rocks
Use different shades of green, or even rainbow colors for each leaf. Kids absolutely love these variations.
Glitter Shamrock Rocks
Add some sparkle with glitter mixed into your paint or applied while the paint is still wet.
Seasonal Shamrock Collections
Paint shamrocks in autumn colors for fall, or pastels for spring. The possibilities are endless.
Advanced Techniques for Experienced Painters
Once you’ve mastered the basic how to paint a shamrock on a rock technique, try these advanced methods:
Dry Brushing for Texture : Use a barely damp brush to add texture to your leaves. This technique creates a more realistic, organic look.
Gradient Shading : Blend from light green at the top of each leaf to darker green at the bottom. It adds incredible depth.
Stippling Effects : Use a sponge or stippling brush to create interesting textures within each leaf.
Metallic Accents : Add gold or silver highlights for special occasion rocks.
Displaying and Gifting Your Shamrock Rocks
These little treasures make incredible gifts. I keep a basket of completed shamrock rocks by my front door for unexpected visitors.
Garden placement works beautifully too. Tuck them among your plants or create a fairy garden border. They’re weatherproof once sealed properly.
For gifting, consider creating sets of three or five rocks. Package them in small cloth bags with a note about spreading luck and positivity.
Troubleshooting Common Issues
Paint Won’t Stick : Your rock might be too smooth or oily. Light sanding or better cleaning usually fixes this.
Colors Look Muddy : You’re probably mixing too many colors or not letting layers dry between applications.
Brushstrokes Show : Thin your paint slightly with water, or use a higher quality brush.
Sealer Looks Cloudy : Apply thinner coats and ensure complete drying between applications.
The Therapeutic Benefits of Rock Painting
I can’t talk about shamrock painted rocks without mentioning how relaxing this craft is. There’s something meditative about the repetitive motions and focus required.
Many of my students tell me rock painting helps them unwind after stressful days. The concentration required naturally quiets anxious thoughts and racing minds.
Plus, you end up with something beautiful and useful. Unlike some crafts that create clutter, painted rocks can be given away, used in gardens, or kept as daily reminders of creativity and accomplishment.
Building Your Rock Painting Skills
Start with shamrocks, but don’t stop there. This foundational project teaches color layering, brush control, and design planning – skills that transfer to more complex rock painting projects.
I recommend keeping a rock painting journal. Document your favorite color combinations, note which techniques work best for you, and track your progress over time.
Consider joining online rock painting communities too. The support and inspiration from fellow artists can accelerate your learning curve significantly.
FAQs
Q: What type of rocks work best for painting? A: Smooth, flat river rocks or beach stones work perfectly. Avoid rocks with lots of texture or porous surfaces.
Q: Can I use regular paint instead of acrylic? A: Acrylic paint is really your best bet. It adheres well, dries quickly, and comes in vibrant colors that won’t fade.
Q: How long do painted rocks last outdoors? A: With proper sealing, painted rocks can last several years outdoors. The key is using quality varnish and applying multiple coats.
Q: Can kids do this project? A: Absolutely! Kids love painting rocks. Just supervise the detail work and help with the sealing step.
Q: What if I make a mistake? A: Let it dry completely, then paint over it. Acrylic paint is very forgiving for corrections.
Q: Do I need artistic experience? A: Not at all! These easy shamrock painted rocks are perfect for beginners. Start simple and build your skills gradually.
Conclusion
Creating shamrock painted rocks combines creativity, mindfulness, and the joy of making something beautiful with your own hands. These simple projects prove that art doesn’t require expensive materials or years of training – just enthusiasm and a willingness to try.
Whether you’re spreading Irish luck, decorating your garden, or simply enjoying a relaxing afternoon activity, these easy shamrock painted rocks deliver satisfaction every time. So grab some rocks, mix those greens, and start creating your own little pieces of magic!