Easy Superhero Painted Rocks: Complete Step-by-Step Guide
Ever wondered how to transform ordinary rocks into easy superhero painted rocks that spark joy and creativity? Picture this: smooth stones becoming miniature canvases for your favorite heroes. Today, I’ll walk you through creating these amazing painted treasures.
Rock painting has captured hearts worldwide, and superhero themes make it even more exciting. These projects bring out the artist in everyone, from kids to adults. You’ll discover how simple materials can create extraordinary results.
Creating Your Own Superhero Rock Art
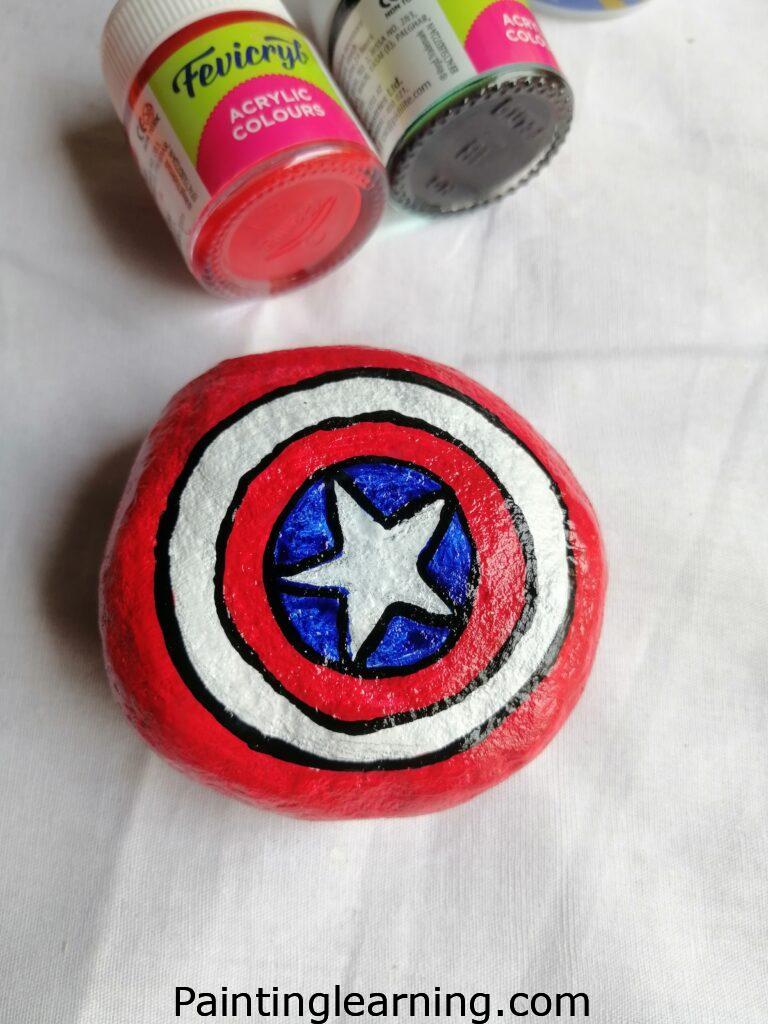
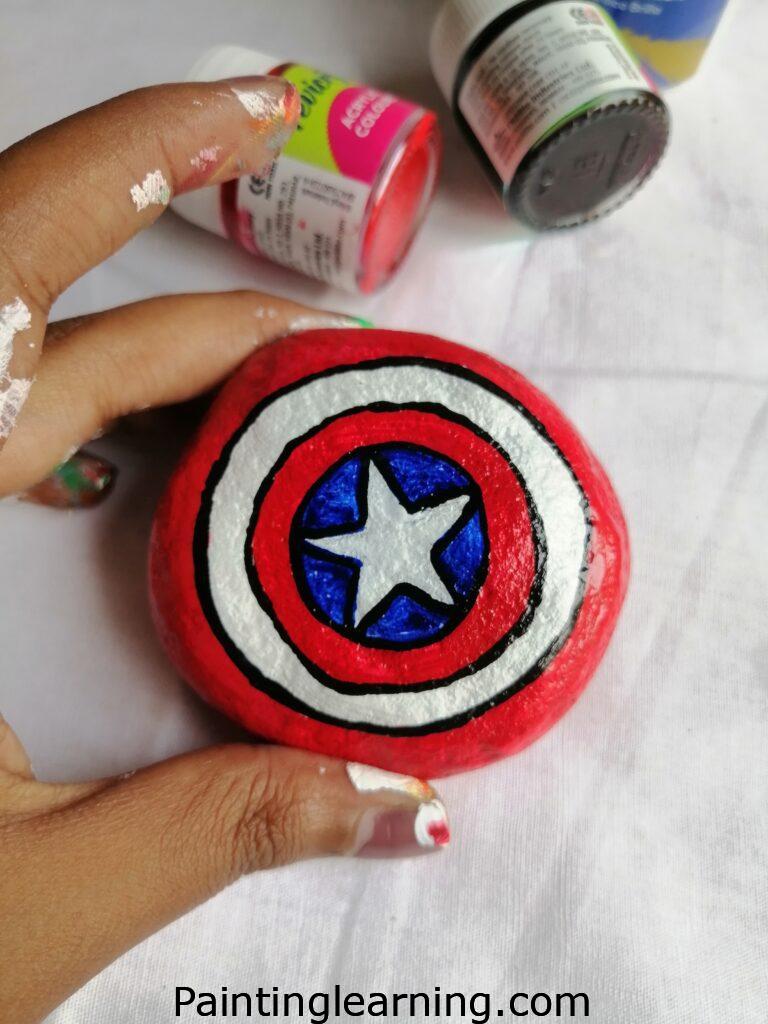
When I first started painting rocks, I never imagined how addictive this hobby would become. There’s something magical about holding a plain stone and envisioning it as Captain America’s shield or Superman’s emblem. Simple superhero painted rocks step by step tutorials make this transformation accessible to everyone.
The beauty of superhero rock painting lies in its simplicity. You don’t need expensive art supplies or years of training. Just basic materials, some creativity, and the willingness to experiment. Each rock becomes a unique piece of art that can brighten someone’s day.
I’ve painted hundreds of rocks over the years, and superhero themes remain my absolute favorite. They’re instantly recognizable, fun to create, and make perfect gifts or hiding treasures for others to find.
Materials Needed
Before diving into our superhero painted rock instructions, let’s gather everything you’ll need. Having the right materials makes all the difference between frustration and success.
| Material | Purpose | Recommended Type | Quantity Needed | Cost Range |
|---|---|---|---|---|
| Rocks | Base canvas | Smooth, flat river rocks | 5-10 pieces | $5-15 |
| White Acrylic Paint | Base coat | Heavy body acrylic | 2 oz tube | $3-5 |
| Blue Acrylic Paint | Star design | Heavy body acrylic | 2 oz tube | $3-5 |
| Red Acrylic Paint | Background color | Heavy body acrylic | 2 oz tube | $3-5 |
| Black Acrylic Paint | Outlines and details | Heavy body acrylic | 2 oz tube | $3-5 |
| Flat Brush | Base coating | Synthetic bristles | 1 inch wide | $2-4 |
| Detail Brush | Fine lines | Fine tip, size 0-2 | 1 piece | $3-6 |
| Varnish | Protective sealer | Outdoor acrylic sealer | 4 oz bottle | $5-8 |
| Pencil | Initial sketching | Standard #2 pencil | 1 piece | $1-2 |
| Water Container | Brush cleaning | Any small jar | 1 piece | Free |
| Paper Towels | Cleanup | Absorbent towels | 1 roll | $2-3 |
Essential Materials:
- Rocks: Choose smooth, flat stones about 3-4 inches wide
- Acrylic Colors: White, blue, red, and black are your core palette
- Varnish: Protects your artwork from weather and wear
- Paint Brushes: Both flat and detail brushes serve different purposes
Optional Supplies:
- Palette paper for mixing colors
- Spray bottle for keeping paints moist
- Toothpicks for tiny details
- Masking tape for crisp edges
Step-by-Step Instructions
Now comes the exciting part – actually creating your superhero masterpiece! I’ll break down how to paint a superhero on a rock into manageable steps that anyone can follow.
Step 1: Prepare Your Base
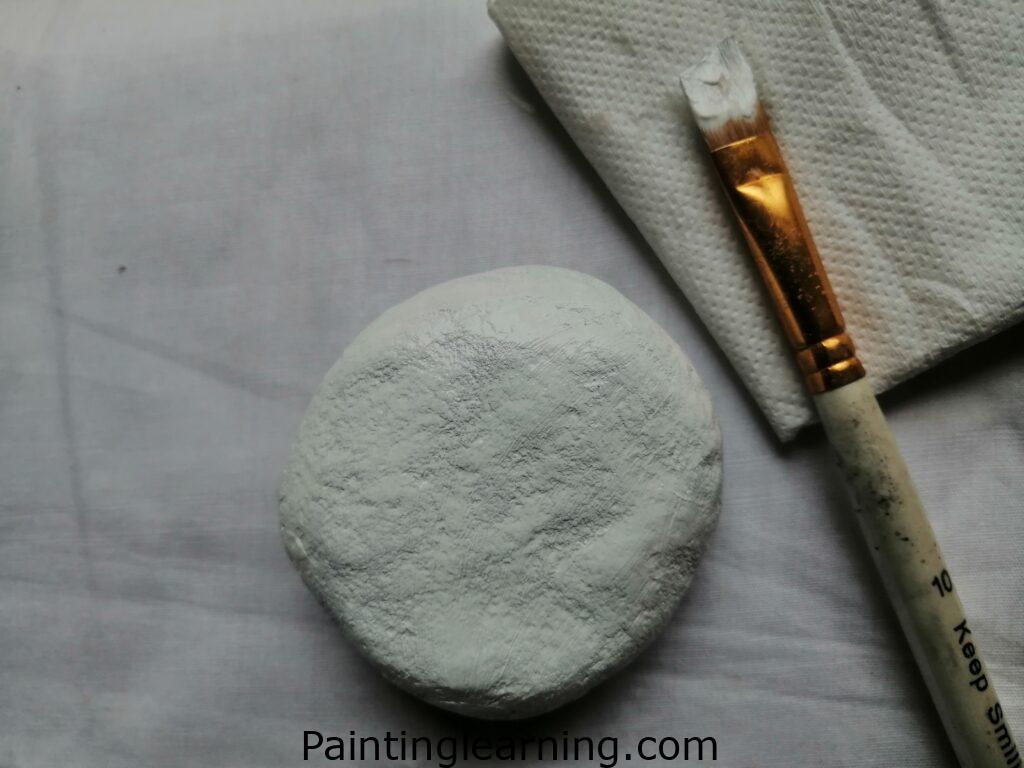
Start by cleaning your rock thoroughly. Remove any dirt, dust, or debris that might interfere with paint adhesion. Let it dry completely before proceeding.
Apply a generous coat of white acrylic paint using your flat brush. Don’t worry about perfect coverage on the first coat – it’s better to apply two thin coats than one thick, streaky layer.
Let the first coat dry completely. This usually takes 30-60 minutes depending on humidity and temperature. Apply a second coat if needed for even coverage.
Once your base is completely dry, lightly sketch your superhero design with a pencil. Keep it simple – we’re going for recognizable, not photorealistic.
Step 2: Paint the Star Design
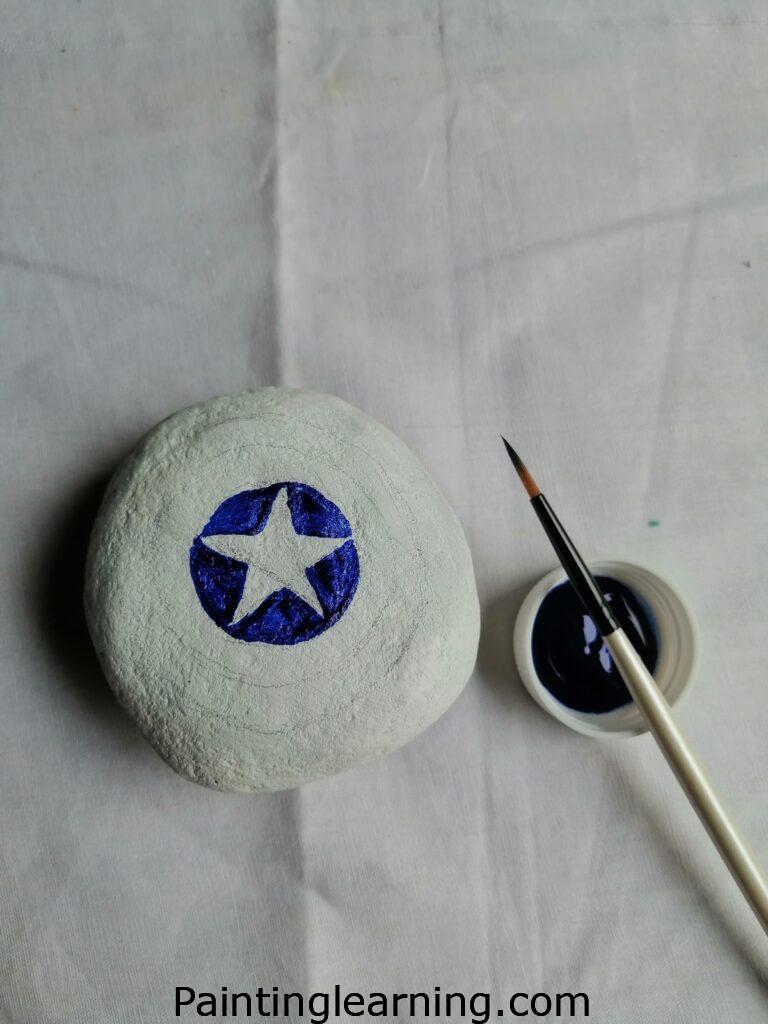
Using your detail brush, carefully paint the star in the center with blue acrylic paint. Take your time here – the star is the focal point of your design.
If you’re nervous about painting freehand, you can create a paper template first. Trace around it with pencil, then fill in with paint.
Pro tip: Load your brush with paint, but not so much that it drips. You want good coverage without losing control.
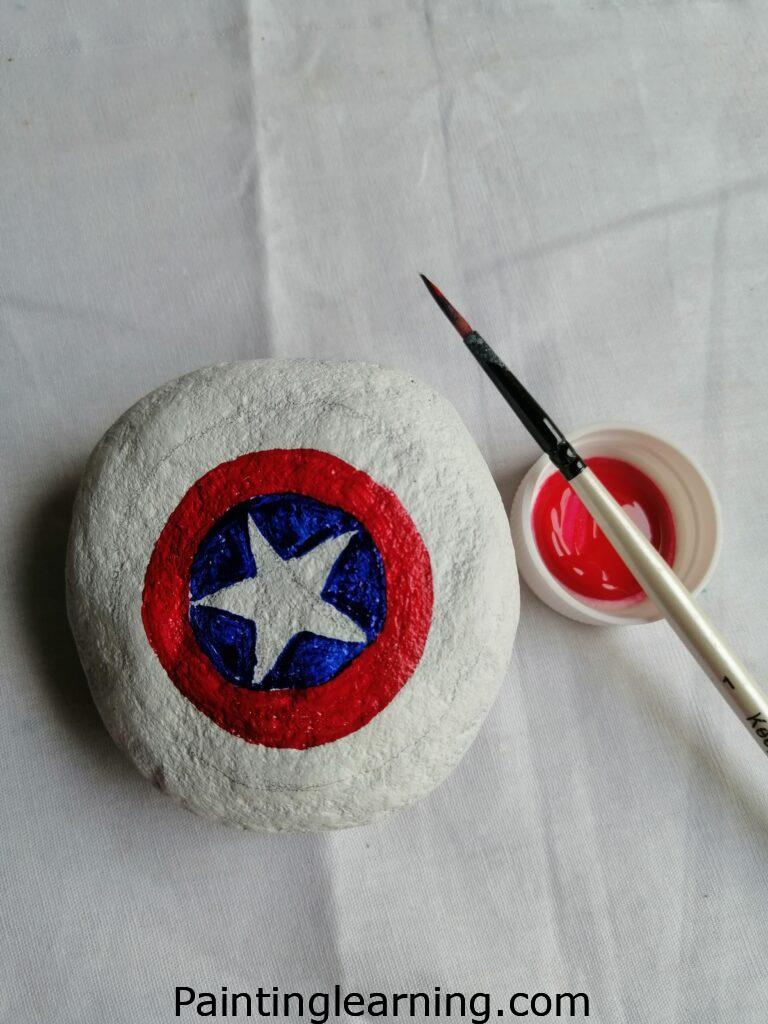
Step 3: Add the Background Color
Now paint the area outside the star with red acrylic paint. Use steady, confident strokes and try to maintain clean edges where red meets blue.
Don’t panic if you accidentally paint over the star’s edges. You can clean this up later with your detail brush and blue paint.
Work in sections, keeping a wet edge to avoid visible brush strokes. The flat brush works well for larger areas.
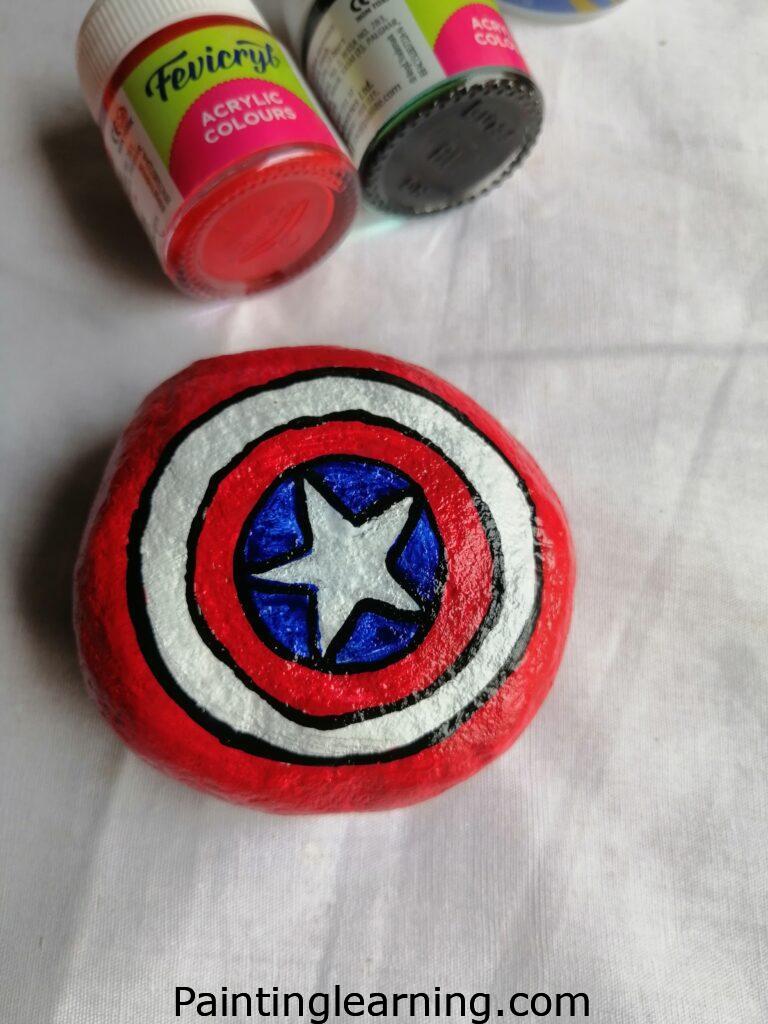
Step 4: Create Bold Outlines

Once everything is dry, use your detail brush to add black outlines around the star and the outer edge of the design. These lines give your superhero rock definition and make it pop.
Keep your hand steady and work slowly. If you make a mistake, let it dry completely before painting over it.
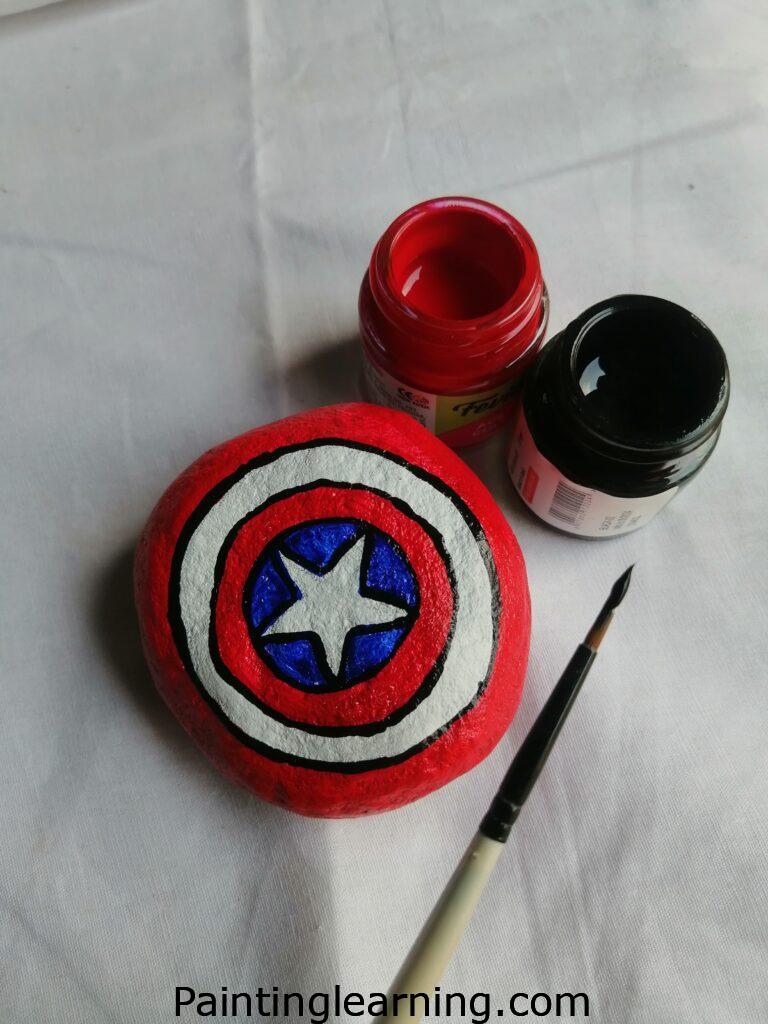
The black outlines are what transform your painted rock from amateur to professional-looking.
After all paint is completely dry (wait at least 2 hours), apply a thin, even coat of varnish with a clean brush. This protects your artwork and gives it a professional finish.
Let the varnish dry according to package directions before handling your completed superhero rock.
Key Terms and Definitions
Base Coat : The first layer of paint applied to seal and prepare the rock surface
Detail Brush : A small, fine-tipped brush used for precise lines and small areas
Flat Brush : A wide brush with a flat edge, perfect for covering large areas evenly
Varnish : A protective clear coating that seals and protects painted surfaces
Wet Edge : Keeping paint moist while working to avoid visible brush strokes
Tips for Success
After painting countless rocks, I’ve learned some tricks that make the difference between good and great results.
Preparation is Everything Choose your rocks carefully. Smooth, flat surfaces work best for beginners. Avoid rocks with deep cracks or very porous surfaces.
Paint Consistency Matters Your paint should be thick enough to cover well but thin enough to flow smoothly. If it’s too thick, add a tiny drop of water. Too thin? Let it sit open for a few minutes to thicken.
Less is More Don’t overload your brush with paint. It’s better to make multiple light passes than one heavy, drippy one.
Practice Makes Perfect Try your design on paper first. This helps you work out proportions and color placement before committing to the rock.
Work in Good Light Natural light is best, but a bright lamp works too. Poor lighting makes it hard to see what you’re doing and leads to mistakes.
Common Mistakes and How to Avoid Them
I’ve made every mistake in the book, so you don’t have to! Here are the most common problems and their solutions.
Paint Won’t Stick Problem: Paint beads up or wipes off easily Solution: Clean your rock thoroughly and ensure it’s completely dry before painting
Colors Look Muddy Problem: Your bright colors turn gray or dull Solution: Always use a white base coat, and let each color dry completely before adding the next
Wobbly Lines Problem: Your outlines look shaky or uneven Solution: Rest your hand on the table for stability, and move the rock instead of just your brush
Paint Cracks or Peels Problem: Your finished rock develops cracks or paint flakes off Solution: Apply thin coats and let each dry completely. Always seal with varnish
Brush Marks Show Problem: You can see every brush stroke in the final result Solution: Use quality brushes and maintain a wet edge while painting
Similar Variations You Can Make
Once you’ve mastered the basic superhero rock, the possibilities are endless! Here are some variations I love creating.
Different Superhero Symbols
- Batman’s bat symbol (black on yellow)
- Wonder Woman’s eagle (gold on red)
- Spider-Man’s web pattern (red and blue)
- The Flash’s lightning bolt (yellow on red)
Size Variations
- Mini rocks for keychains or desk displays
- Large rocks for garden decorations
- Flat rocks for refrigerator magnets
Themed Collections
- Create a whole Justice League set
- Make villain symbols for contrast
- Design your own original superhero emblems
Advanced Techniques
- Add metallic accents with gold or silver paint
- Create 3D effects with layered painting
- Use stencils for perfect symmetry
Caring for Your Painted Rocks
Your beautiful superhero rocks will last for years with proper care. Here’s how to keep them looking their best.
Indoor Display Dust occasionally with a soft, dry cloth. Avoid harsh chemicals or abrasive cleaners that might damage the paint or varnish.
Outdoor Placement If you’re hiding your rocks outside or using them in garden displays, reapply varnish annually to maintain protection.
Storage Wrap in soft cloth if storing long-term. Avoid stacking painted rocks directly on top of each other.
Frequently Asked Questions
Q: Can I use regular house paint instead of acrylic? A: Acrylic paint is specifically designed for crafts and adheres better to rock surfaces. House paint may not stick well and could peel off.
Q: Do I need to seal rocks that will stay indoors? A: While not absolutely necessary for indoor rocks, varnish adds durability and a professional finish that’s worth the extra step.
Q: Can kids do this project? A: Absolutely! This is perfect for kids 6 and up with adult supervision. Use washable paints for easier cleanup.
Q: What if I don’t have a detail brush? A: You can use a toothpick or even a cotton swab for small details, though a proper detail brush gives better results.
Q: How long does the paint take to dry? A: Acrylic paint typically dries to the touch in 30-60 minutes, but wait 2-3 hours before handling or adding additional coats.
Q: Can I paint over mistakes? A: Yes! Let the mistake dry completely, then paint over it. You might need multiple coats to completely cover dark colors.
Taking Your Rock Painting Further
Once you’ve caught the rock painting bug (and trust me, you will!), there’s a whole world of possibilities to explore.
Join the Community Rock painting groups exist in most communities. Search social media for local groups or start your own!
Rock Hiding Games Many communities have “Kindness Rocks” movements where painted rocks are hidden for others to find. It’s a wonderful way to spread joy.
Seasonal Themes Adapt your superhero rocks for holidays – Halloween spider symbols, Christmas shield designs, or patriotic themes for July 4th.
Advanced Projects Try painting rock families, create story scenes across multiple rocks, or experiment with glow-in-the-dark paints for nighttime superhero adventures.
Conclusion
Creating easy superhero painted rocks has been one of my most rewarding artistic journeys. What started as a simple afternoon project has grown into a passion that brings joy to my life and others around me.
These simple superhero painted rocks step by step instructions give you everything needed to start your own rock painting adventure. Whether you’re looking for a relaxing hobby, a fun family activity, or a way to spread kindness in your community, superhero rock painting delivers on all fronts. So grab some rocks, squeeze out those paints, and let your creativity soar – your first superhero rock masterpiece is just a brushstroke away!